Vendor Admin — Tester Walkthrough
A click-by-click, plain-language guide to every screen in the Vendor Admin (the seller back office) for QA and testers: what each module is for, where to find it, what you should see, and the exact steps to exercise it — with screenshots from the live app.
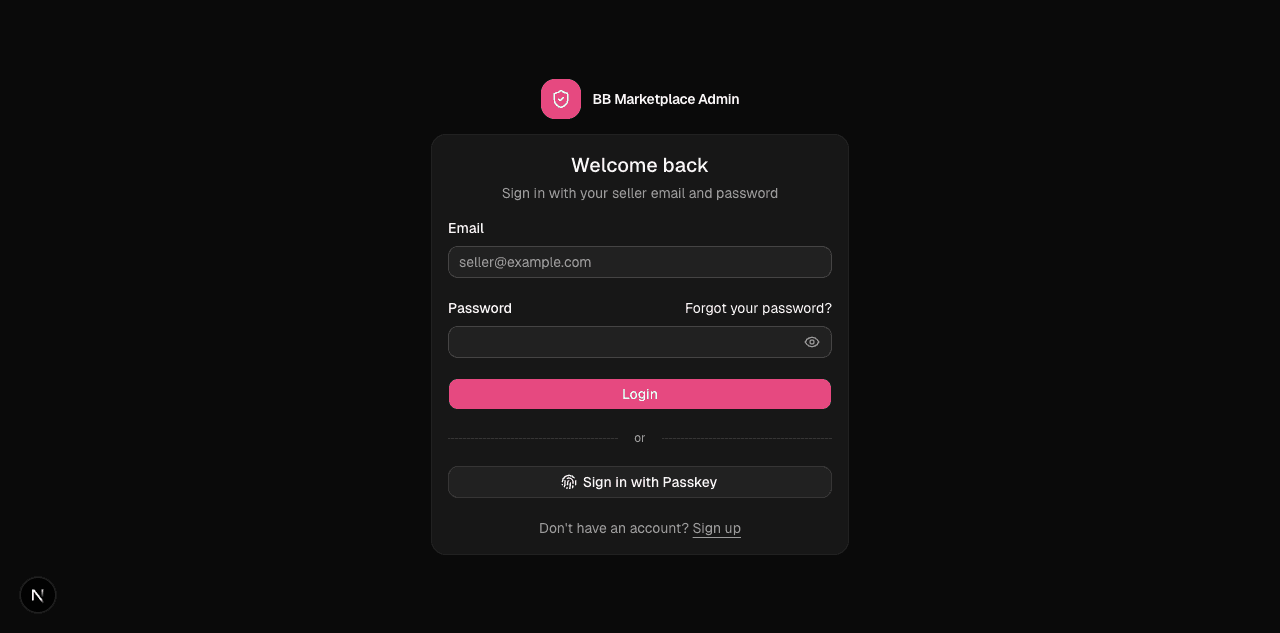
The Vendor Admin is the back office for one seller. A vendor manages only their own products, stock, orders, returns, reviews and payouts here — they never see another vendor's data. It's the seller-side counterpart to the Marketplace Admin Panel.
- URL:
http://localhost:3005 - Login:
vendor@beautybarn.in/supersecret
If you haven't read the Start Here overview, read it first — especially the part about parent orders vs per-vendor sub-orders, because a vendor only ever works with their slice (the sub-order).
The golden rule for vendor testing: a vendor must never be able to see or touch another vendor's data. If you try to open a record that belongs to a different vendor, the correct result is a "Page not found" — not a "forbidden" error. "Not found" is the intended, secure behaviour: it hides the very existence of other vendors' data. Treat it as a pass, not a bug.
How the screens are organised
The left sidebar groups everything into four sections:
- Platform — Dashboard, Catalog (Products / Requests), Inventory.
- Sale — Orders, Shipping, Returns, Reviews, Reports.
- Payments — Payouts.
- Settings — Store Settings, Tax.
The same shared controls apply on every list (search, Columns, sort, pagination, breadcrumb) as in the admin panel.
Becoming a vendor (onboarding)
Before a seller can use any of the screens below, they go through onboarding:
- Sign up / apply. From the login screen a new seller can Sign up and submit a vendor application.
- Wait for approval. An admin reviews the application in the Admin Panel (Vendors → Applications) and approves or rejects it.
- Onboarding. After approval, on first login the vendor is walked through an onboarding flow to complete their store profile before the full dashboard unlocks.
What to test: sign up as a brand-new seller → confirm the application shows up on the admin side → approve it there → log in as the new vendor → confirm the onboarding flow appears and, once completed, the dashboard becomes available.
Dashboard
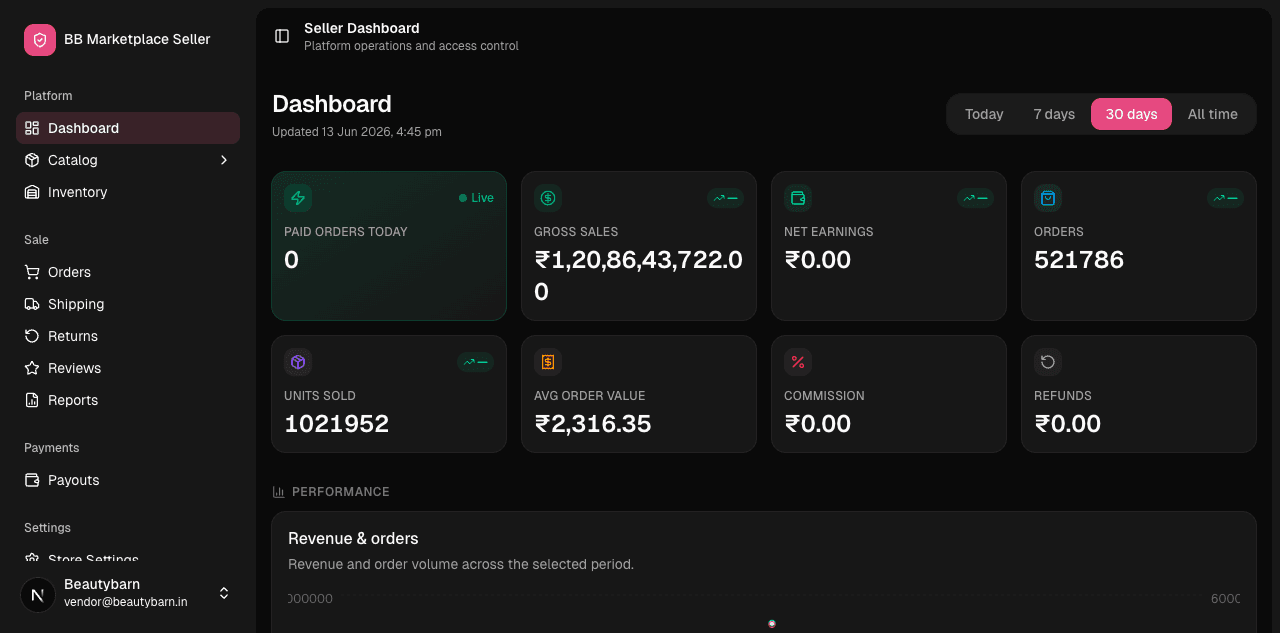
What it's for: the seller's at-a-glance performance — paid orders today, gross sales, net earnings, total orders, units sold, average order value, commission taken by the marketplace, and refunds, with a revenue chart. Everything is scoped to this vendor only.
Where: sidebar → Dashboard (the home screen after login).
What to test:
- Switch the period (Today / 7 days / 30 days / All time) and confirm every tile and the chart update.
- Confirm the numbers are only this vendor's (compare against the admin dashboard, which is the platform-wide total — the vendor's should be a subset).
- The "Paid Orders Today" tile carries a Live badge; place a storefront order for this vendor's product and watch it tick up without refreshing.
Catalog
Where the vendor manages the products they sell. A product belongs to exactly one vendor.
Products
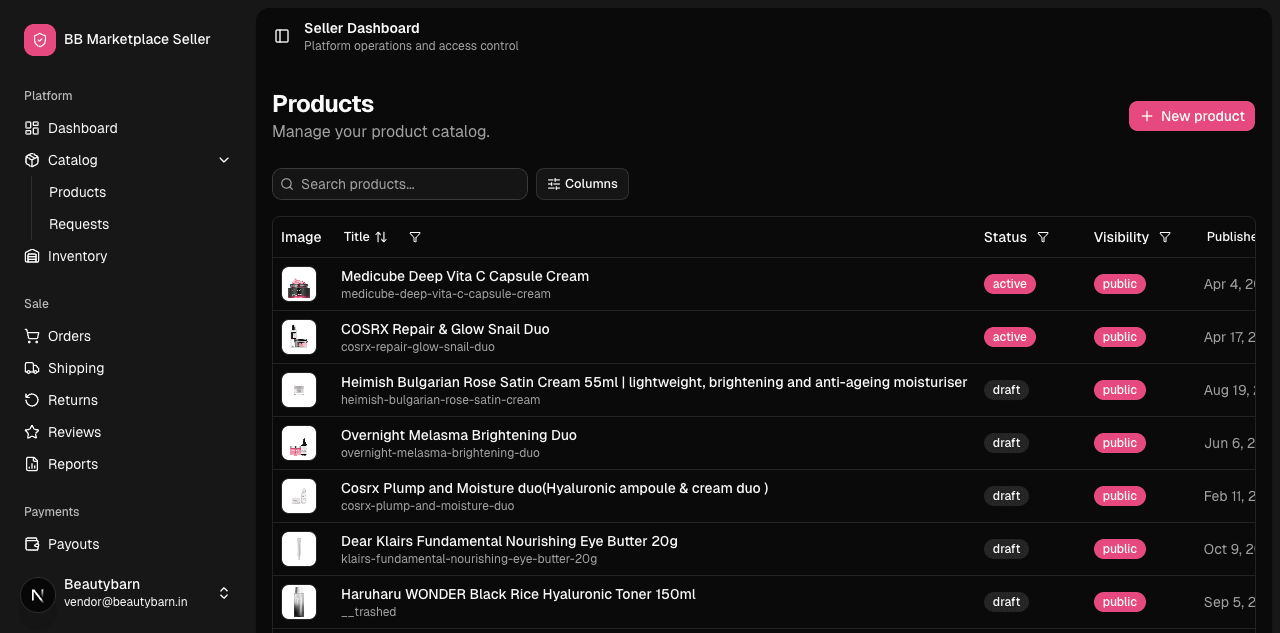
What it's for: create and maintain the vendor's products — their variants, options and the descriptive tabs shown on the storefront product page.
Where: sidebar → Catalog → Products.
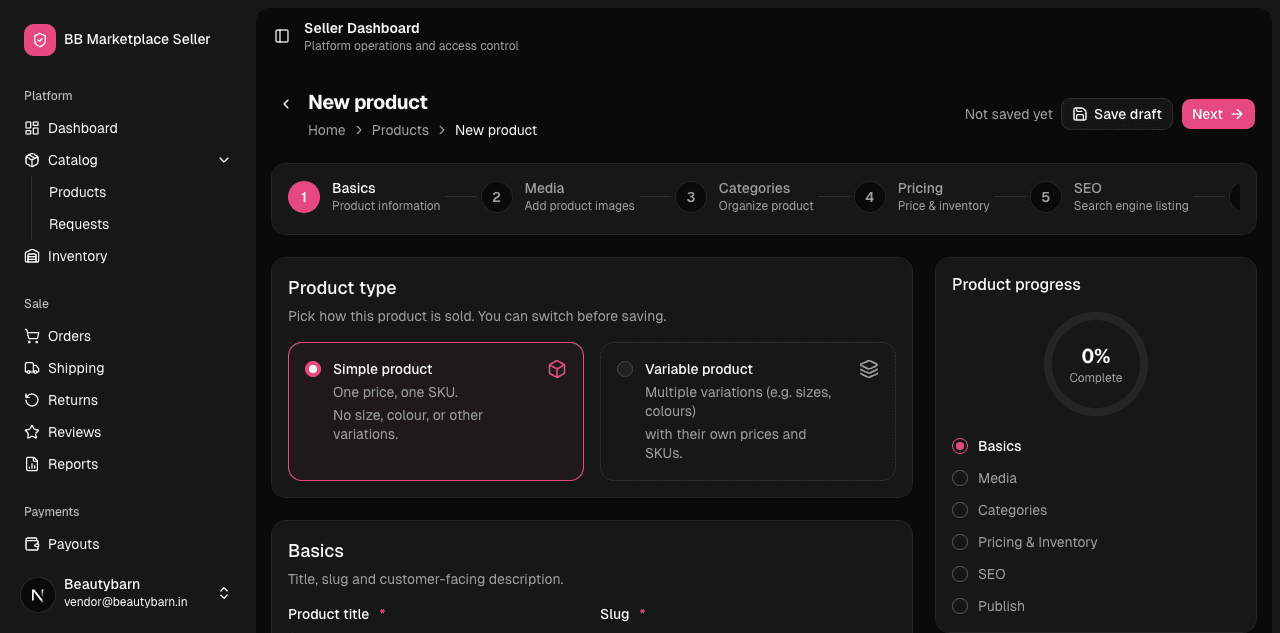
Creating a new product:
Opening an existing product:
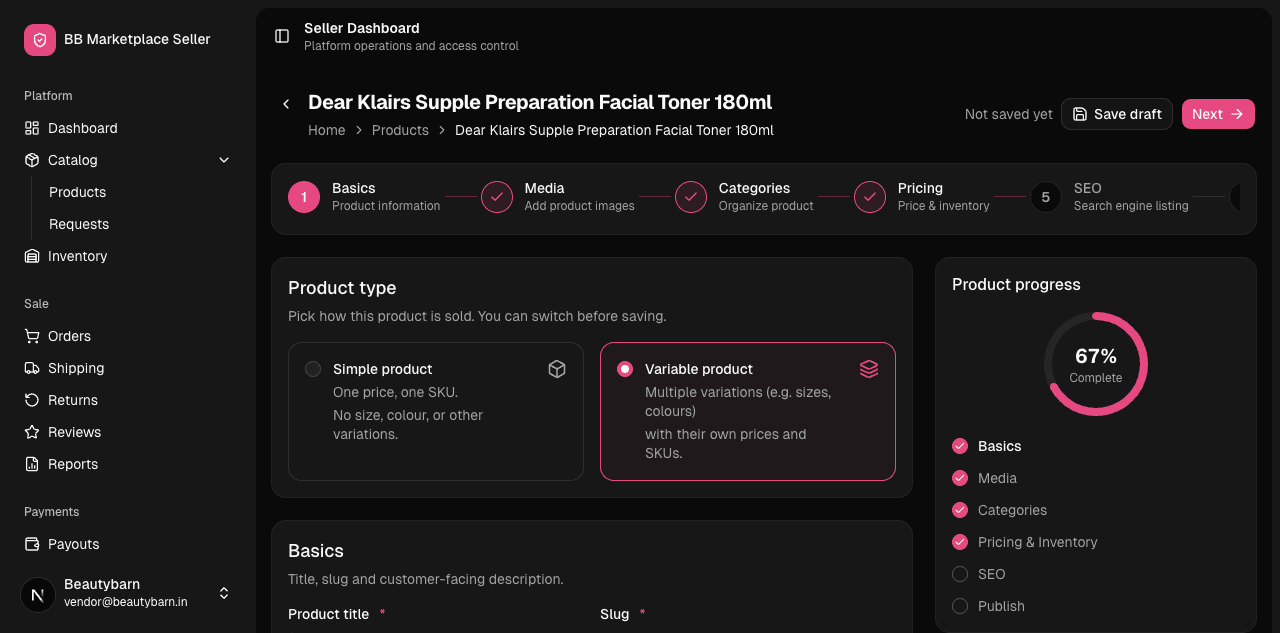
What to test:
- Create a product: name, description, images, at least one variant (a variant is the actual buyable unit — e.g. a size/shade). Set the price (shown in ₹).
- Confirm the variant carries an HSN code (the tax classification snapshotted onto orders at purchase time).
- Edit the product, add a second variant, reorder images, edit the descriptive tabs.
- Soft-delete a product and confirm it disappears from the storefront but isn't hard-deleted.
- Security check: a product can only ever belong to this vendor — there's no way to attach it to another vendor.
Requests
What it's for: vendors can't create shared taxonomy (brands, categories, tags, ingredients) themselves — those are platform-wide. Instead they request a new one here, and an admin approves it.
Where: sidebar → Catalog → Requests.
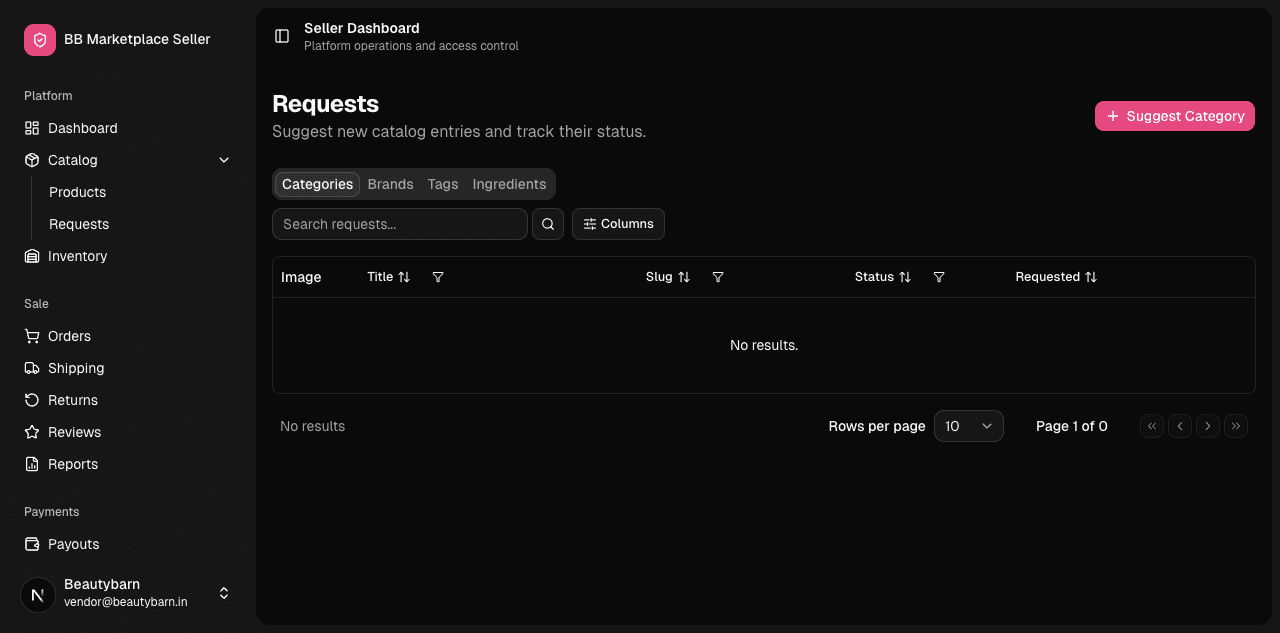
What to test:
- Submit a request for a new brand/category/tag/ingredient.
- Confirm it appears in this list as pending.
- On the admin side, approve it (Admin Panel → Catalog) and confirm the request flips to approved here and the new entry becomes selectable on the vendor's products.
Inventory
What it's for: stock levels for the vendor's variants — set quantities, stock policy, make manual adjustments (with a reason), see the audit trail, and do bulk CSV imports.
Where: sidebar → Inventory.
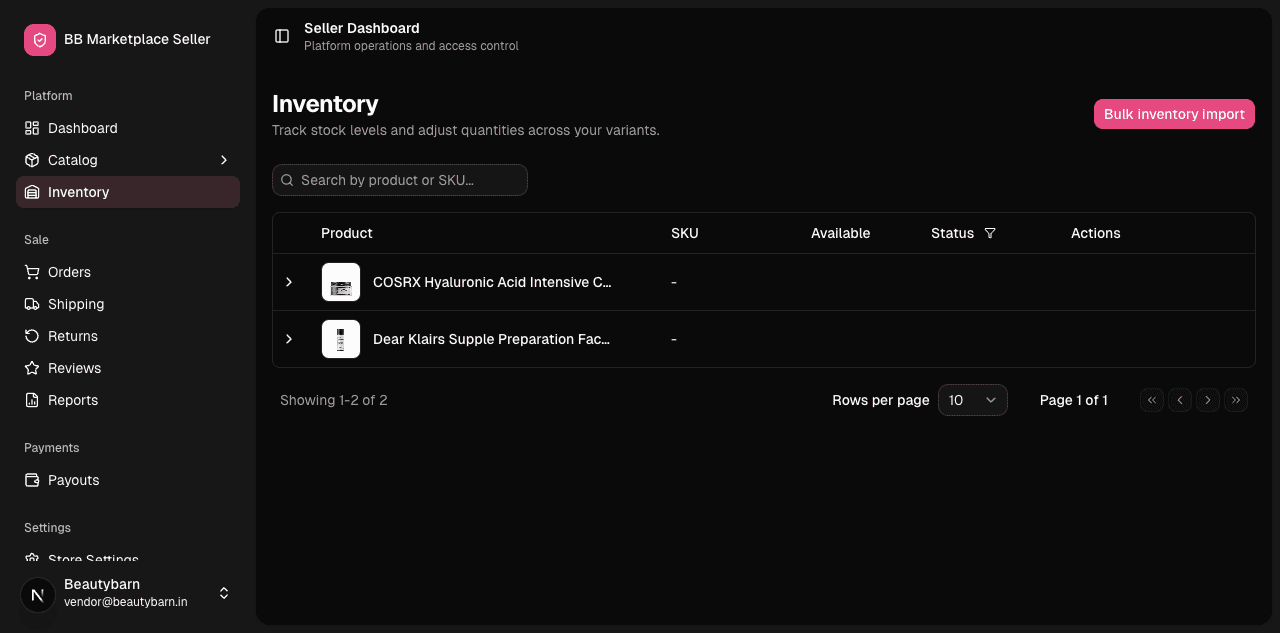
Each product row expands to show its variants and their stock, with Adjust and detail actions:
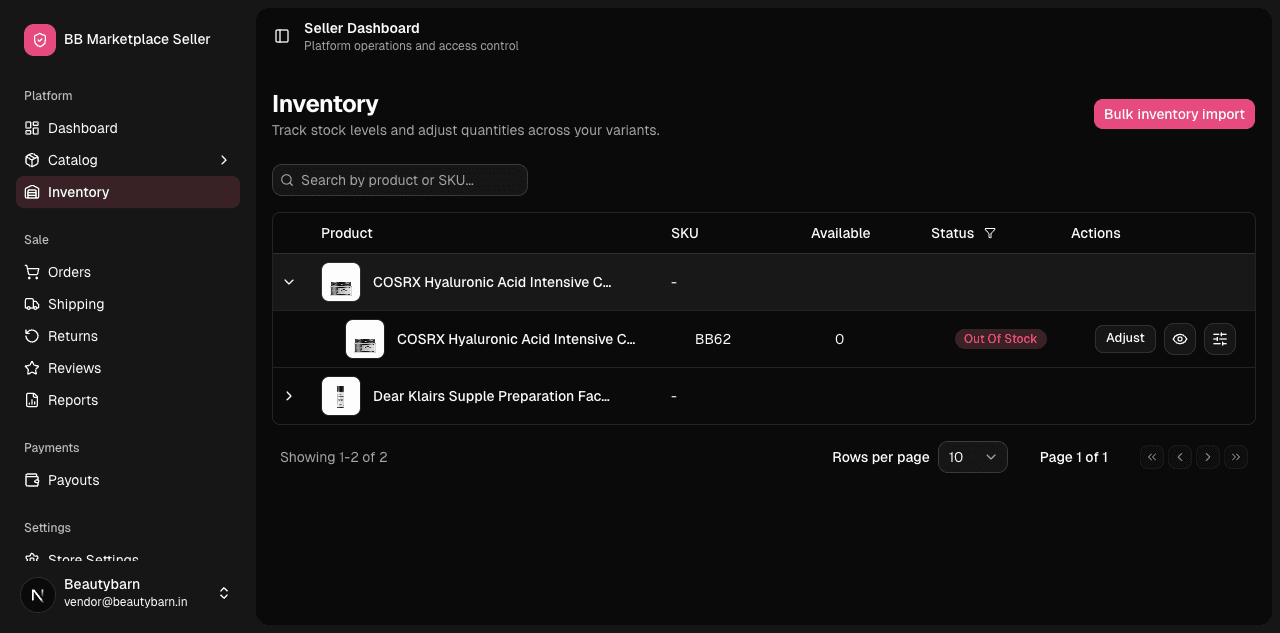
What to test:
- Expand a product, find a variant, and read its Available quantity and status (In Stock / Out of Stock).
- Adjust stock (e.g. +10) with a reason; confirm Available updates and an entry is added to the audit trail.
- Place a storefront order for that variant and confirm Available drops (stock is reserved/consumed) — this proves the inventory ↔ order link.
- Take a variant to 0 and confirm it shows Out of Stock and can't be over-sold.
Bulk import
What it's for: updating many variants' stock at once via a spreadsheet.
Where: sidebar → Inventory → Bulk inventory import (button), import history at /inventory/import.
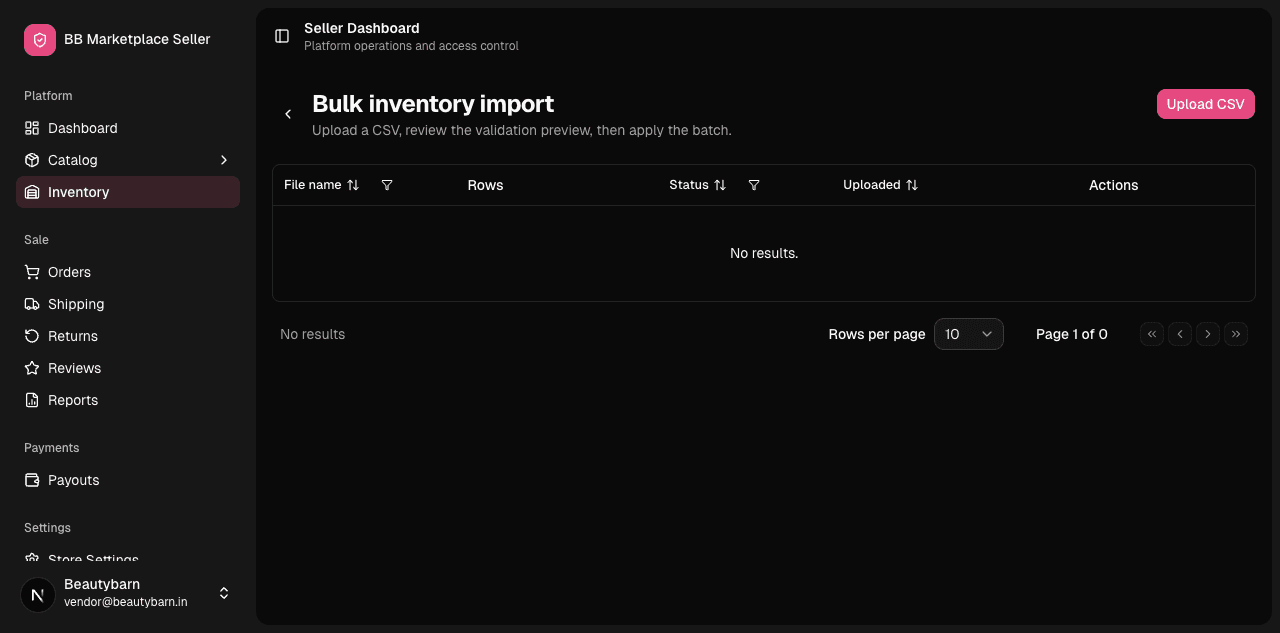
What to test:
- Download/prepare the CSV template, upload it, and confirm a row-by-row result (succeeded / failed with reasons).
- Upload a deliberately bad file and confirm errors are reported clearly without corrupting good rows.
Orders (Sale)
What it's for: the heart of the seller's day — the vendor's sub-orders. For each one the vendor assigns a shipping provider, marks it fulfilled, then delivered, or cancels it; they can also generate the order's GST invoice.
Where: sidebar → Orders.
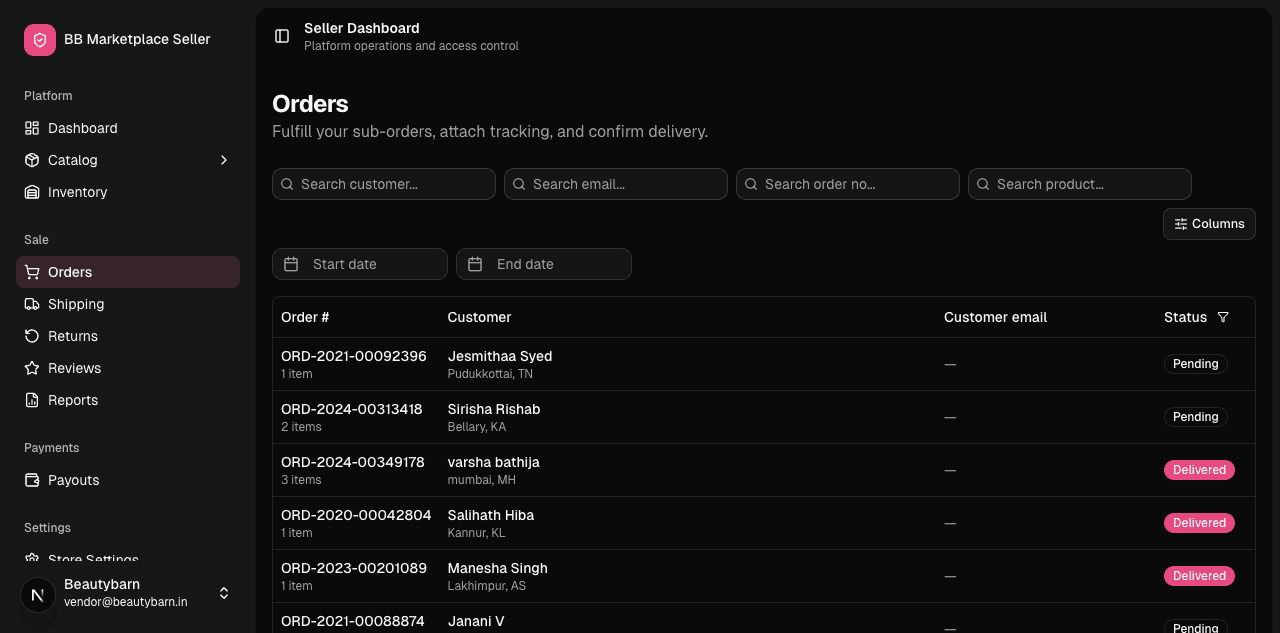
Opening a sub-order:
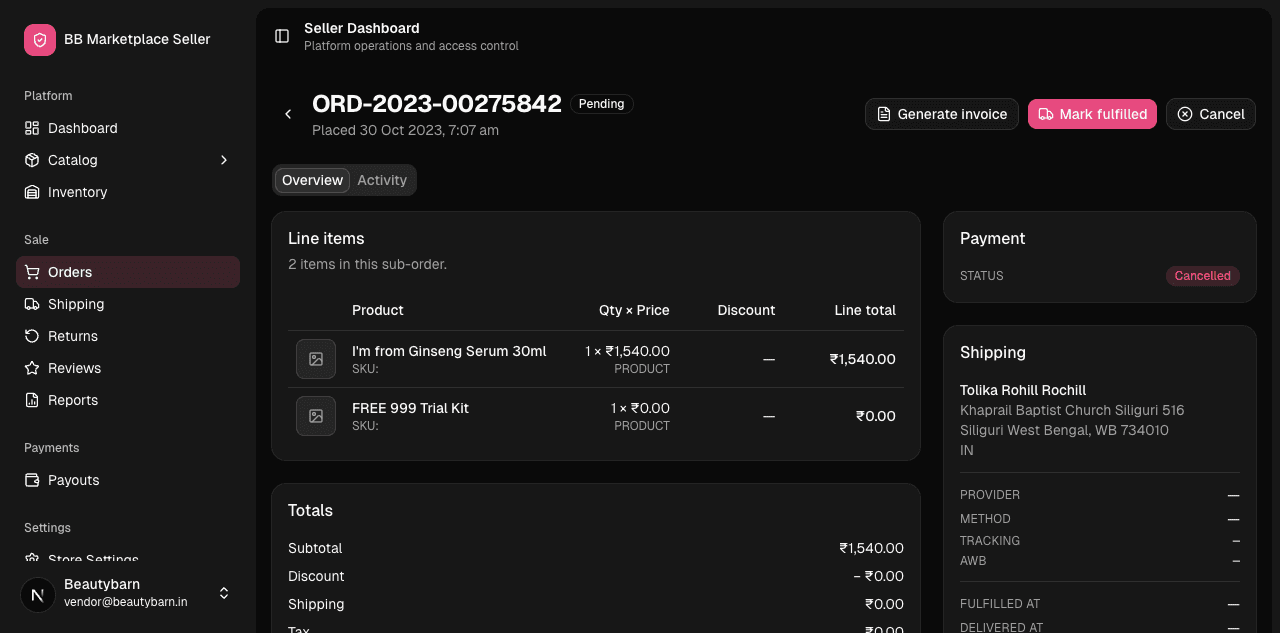
What to test (the fulfilment flow — the most important vendor test):
- Open a sub-order. Confirm it shows only this vendor's line items (not the customer's whole basket), the order number, status (Pending / Fulfilled / Delivered / Cancelled), payment status, and the shipping address.
- Mark fulfilled: assign a shipping provider / tracking, then mark it fulfilled. Status should advance and the change should appear under the Activity tab.
- Mark delivered and confirm the timeline records it.
- Generate invoice: trigger the GST invoice. It renders in the background; confirm you can download the PDF when ready, and that the vendor only ever sees their own invoice (its own GSTIN), never a sibling vendor's.
- Cancel a sub-order and confirm stock is released.
- Cross-check on the admin side that the parent order reflects the vendor's status change.
Shipping
What it's for: the vendor's shipping configuration — the flat customer-charge rate, a free-shipping-above threshold, and which couriers/providers are enabled — plus the per-sub-order tracking timeline.
Where: sidebar → Shipping.
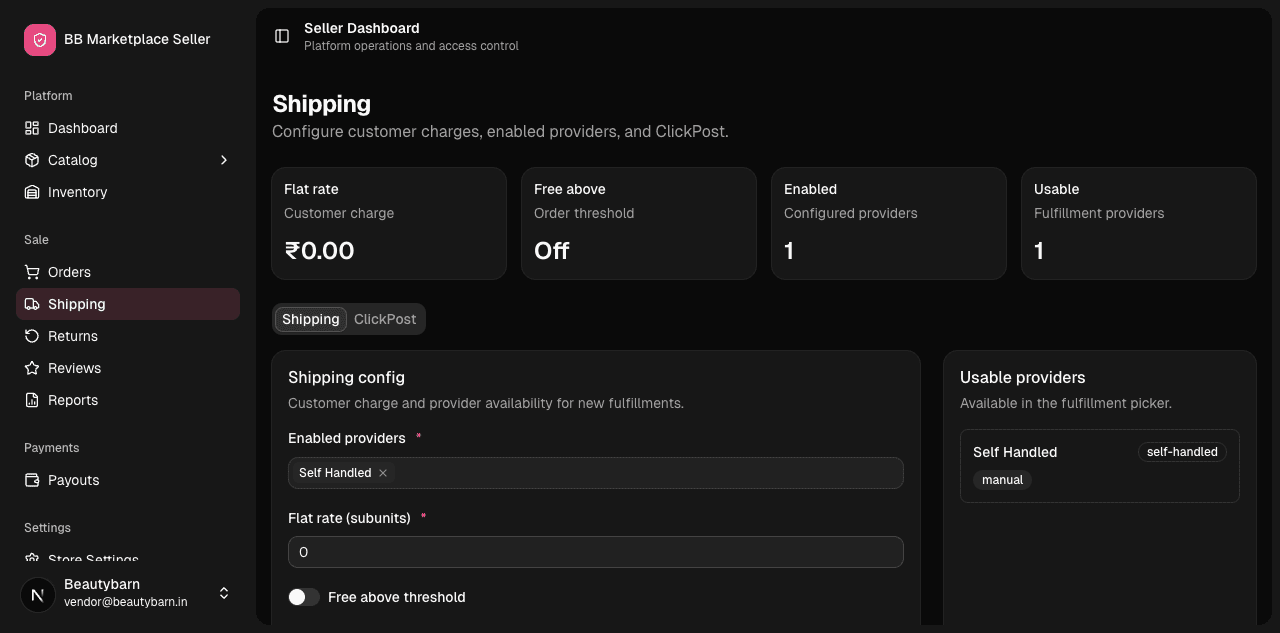
What to test:
- Set the flat customer charge and a free-above threshold; confirm a storefront cart below the threshold is charged shipping and one above it isn't.
- Enable/disable a provider and confirm it's reflected when fulfilling an order.
- Open a fulfilled order's tracking timeline and confirm the events read correctly.
Note the two-layer shipping model: the customer charge (the flat rate set here, applied in the cart) is separate from the courier/provider the vendor assigns when actually fulfilling the order.
Returns
What it's for: handling customer return requests on the vendor's own orders — approve or reject a request, arrange pickup, receive the item back, and refund.
Where: sidebar → Returns.
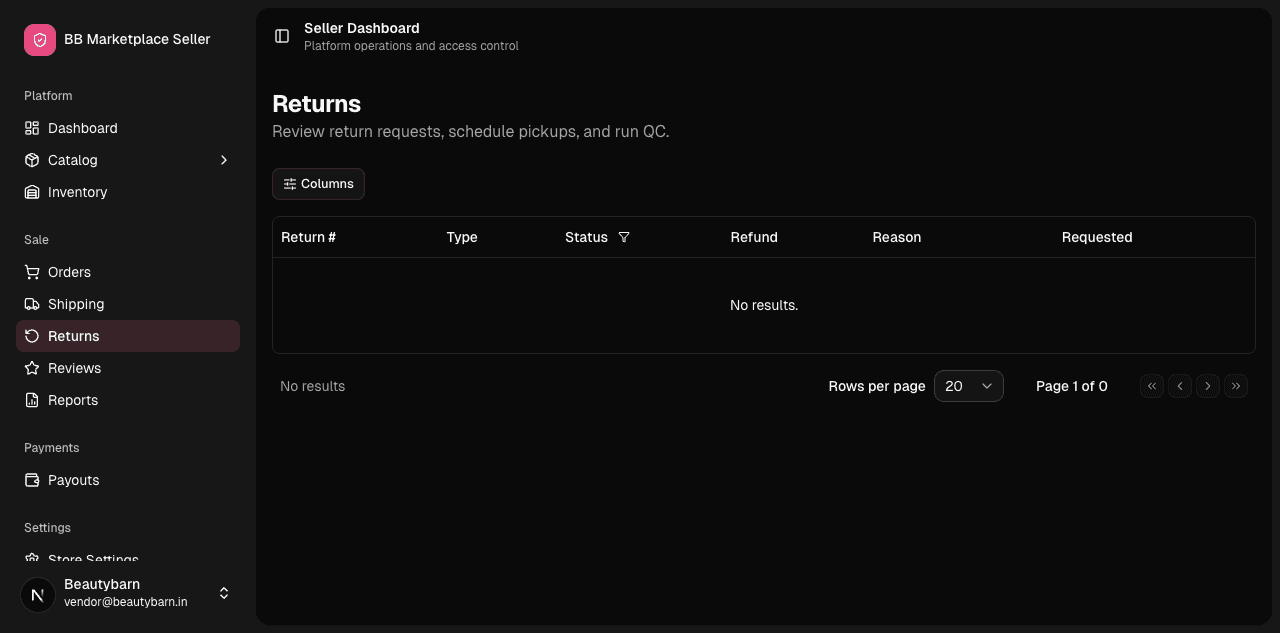
What to test (the return flow):
- As a customer, request a return on a delivered order.
- As the vendor, open the return → approve (or reject with a reason).
- Walk it through pickup → received → refunded; confirm each step updates the status and timeline.
- Confirm the refund is reflected back to the customer and visible to the admin.
- Try to open a return belonging to another vendor → expect Page not found.
Reviews
What it's for: moderating customer reviews on the vendor's own products — list, edit content, approve/reject, mark/unmark as spam, and soft-delete.
Where: sidebar → Reviews.
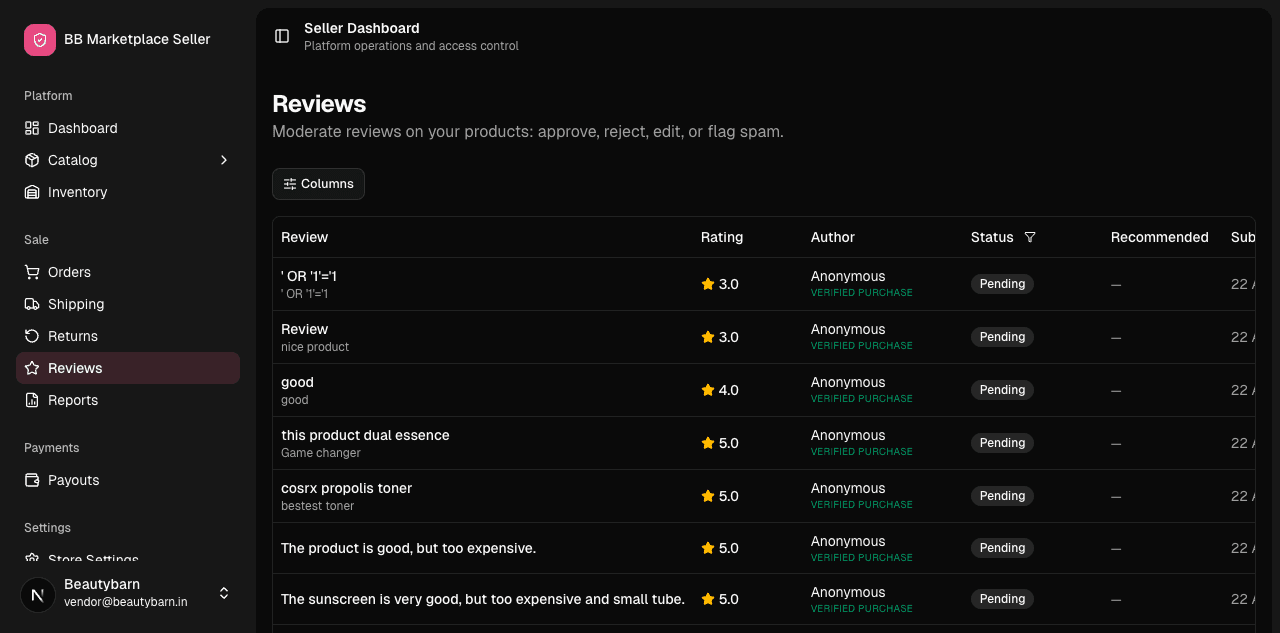
What to test:
- Find a pending review and approve it; confirm it then shows on the storefront product page.
- Reject / mark spam on another and confirm it's hidden.
- Edit a review's content (e.g. redact something) and confirm it saves.
- Confirm only reviews on this vendor's products are listed.
Reports (Sale)
What it's for: the vendor's own operational reports (orders and sub-orders) with a date range, KPI/trend views, and async CSV/XLSX exports — all locked to this vendor.
Where: sidebar → Reports.
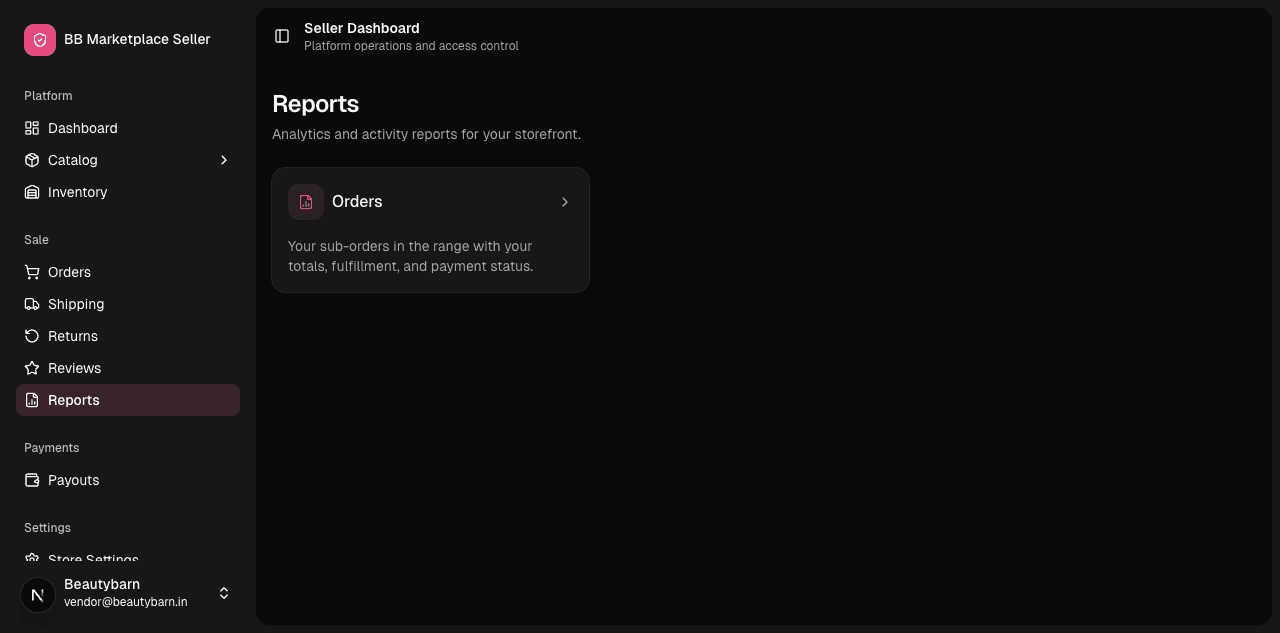
What to test:
- Pick a report, set a date range, confirm the data updates and is only this vendor's.
- Trigger an export and download the resulting file when ready.
Payouts (Payments)
What it's for: the money the marketplace owes this vendor for their sales. The vendor watches their earnings accrue and tracks payouts the admin disburses.
Where: sidebar → Payouts.
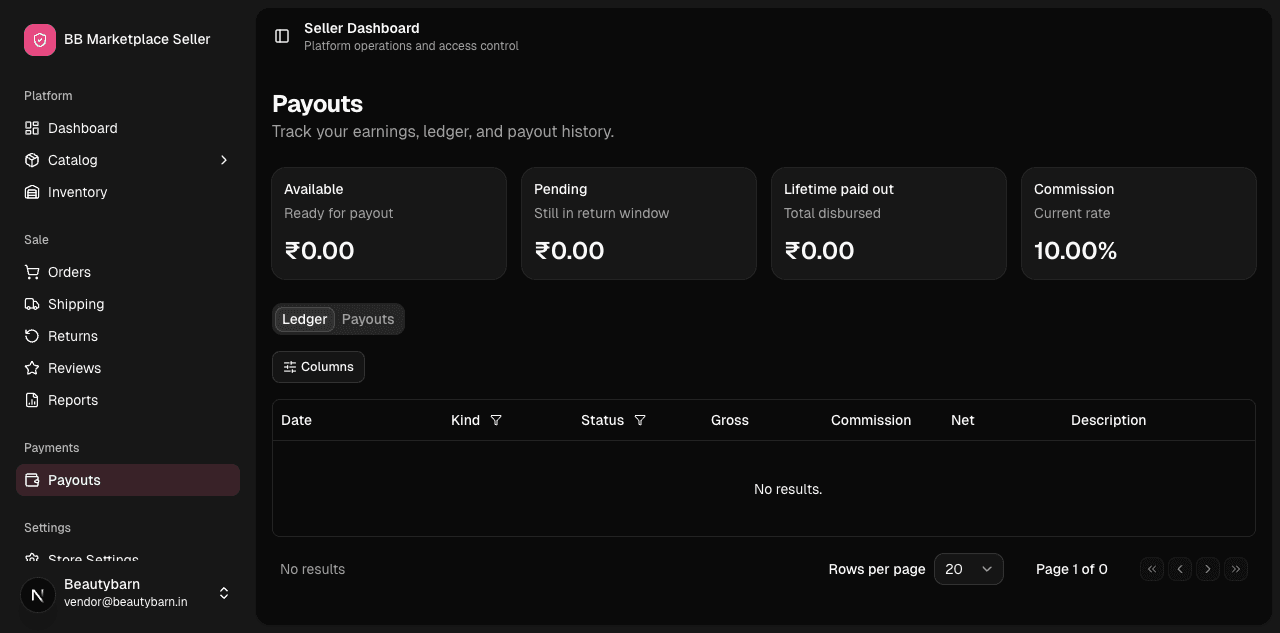
What to test:
- After fulfilling/delivering paid orders, confirm the vendor's owed/earnings balance reflects sales minus the marketplace commission.
- When the admin disburses a payout (Admin Panel side), confirm it appears here with the right amount and status.
- Open a payout to see which orders/period it covers.
Settings
Store Settings
What it's for: the vendor's self-service configuration — staff-facing config (shipping, tax, payout details) and store-facing config — organised by scope.
Where: sidebar → Store Settings.
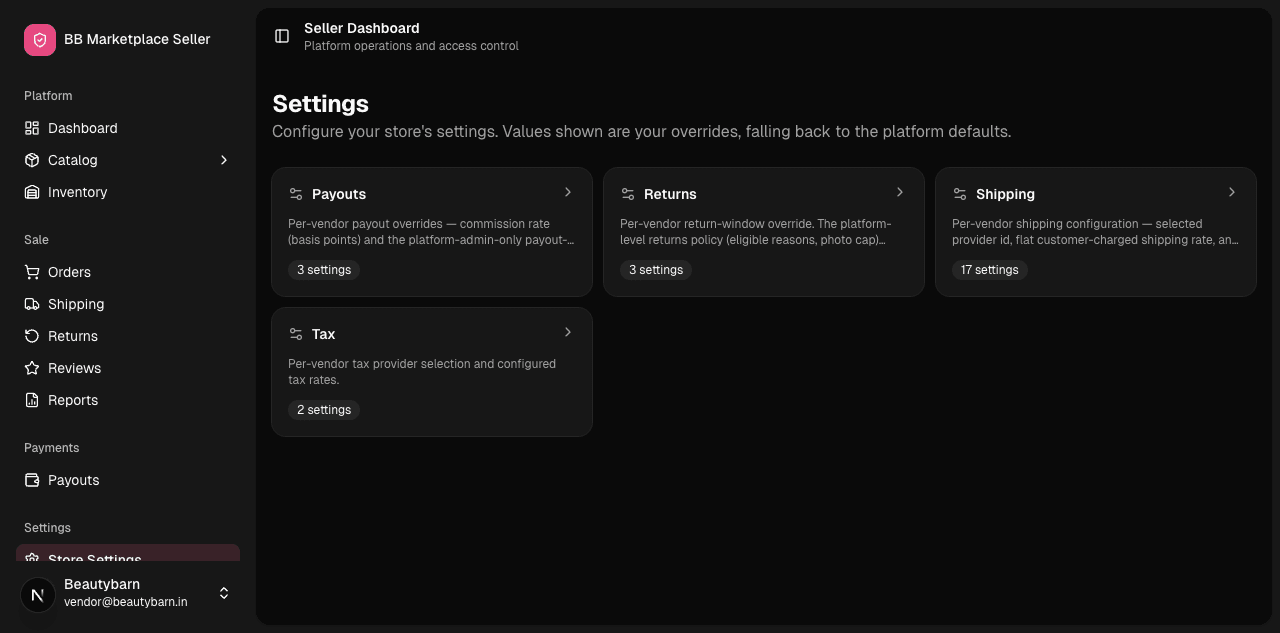
What to test:
- Change a value, save, reload, confirm it persisted.
- Confirm invalid values are rejected with a clear message.
- Confirm a vendor can only edit their own settings; the admin can override them from the admin side.
Tax
What it's for: the vendor's flat tax setup — the inclusive tax rows (type + rate, e.g. GST 18%) applied uniformly to every line on this vendor's orders.
Where: sidebar → Tax.
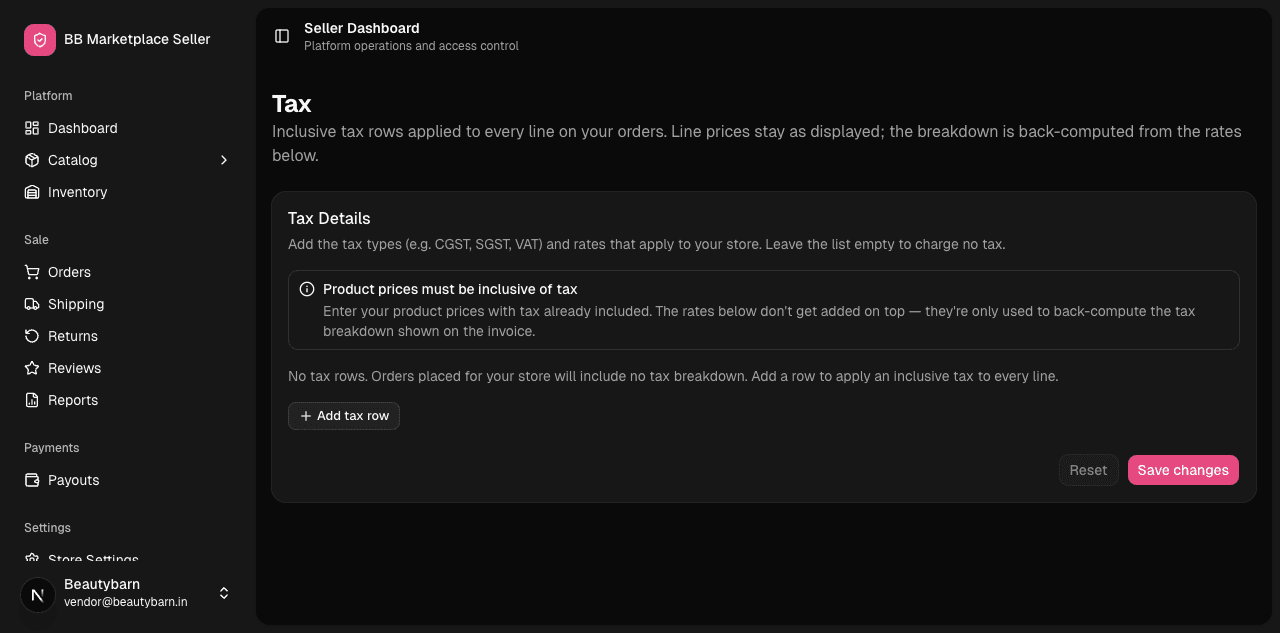
What to test:
- Add/edit a tax row (e.g. GST 18%).
- Place an order and confirm the tax is computed per the configured rows and snapshotted onto the order.
Your account (Profile)
What it's for: the vendor user's own account — profile, security (password/passkey), active sessions, and a danger zone.
Where: click your store name at the bottom-left → Profile / Security / Sessions.
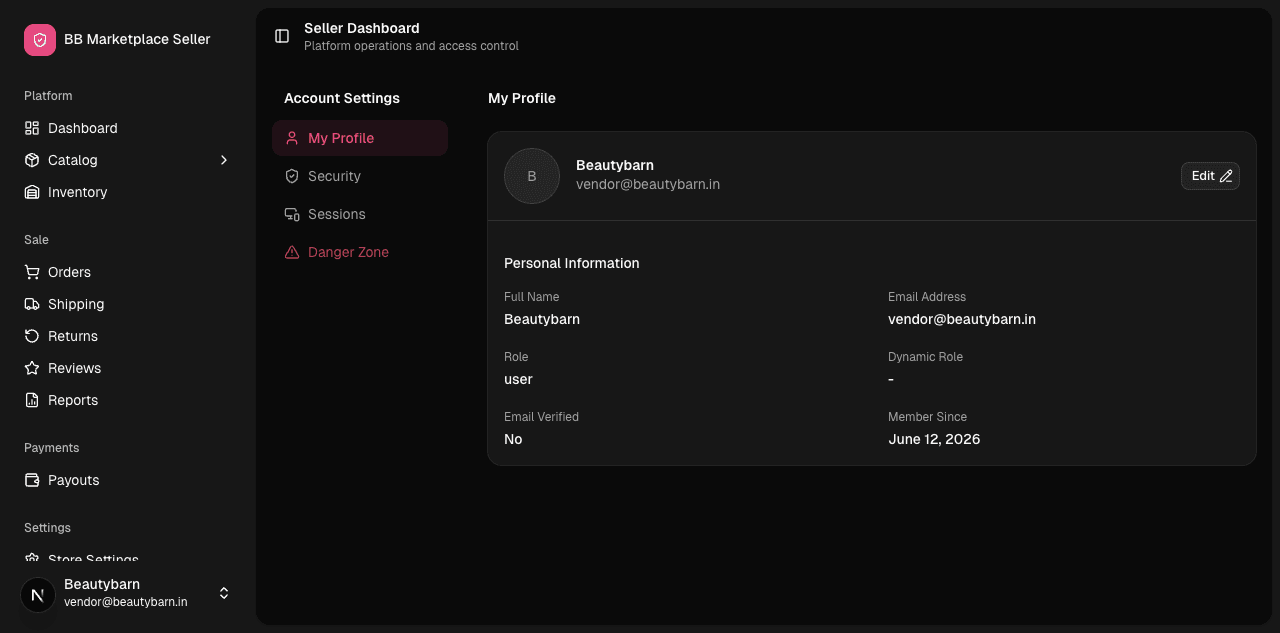
What to test:
- Update profile details; save.
- Change password; confirm re-login.
- Revoke another session under Sessions.
Quick vendor test checklist
- Sign up → admin approves → onboarding appears → dashboard unlocks.
- Dashboard KPIs are this-vendor-only and respond to the period switch.
- Create a product with a variant + HSN; it appears on the storefront.
- Adjust inventory; storefront order drops the stock; 0 stock = Out of Stock.
- Bulk import: good rows succeed, bad rows error clearly.
- Fulfil a sub-order: assign provider → fulfilled → delivered; activity logged.
- Generate the GST invoice; only this vendor's invoice is visible.
- Run a return end-to-end: approve → pickup → received → refunded.
- Moderate a review: approve shows it, reject/spam hides it.
- Shipping flat rate + free-above behave correctly in the cart.
- Payout balance = sales − commission; disbursed payout shows here.
- Security: opening another vendor's order/return/product gives "Page not found".
Back to the Admin Panel guide or the Start Here overview.