Marketplace Admin Panel — Tester Walkthrough
A click-by-click, plain-language guide to every screen in the Marketplace Admin Panel for QA and testers: what each module is for, where to find it, what you should see, and the exact steps to exercise it — with screenshots from the live app.
The Marketplace Admin Panel is the control room for the whole store. From here the platform operator manages every vendor, every order, the shared product catalog, promotions, content, staff and store-wide settings. Whatever a single vendor can see for themselves, the admin can see for all vendors.
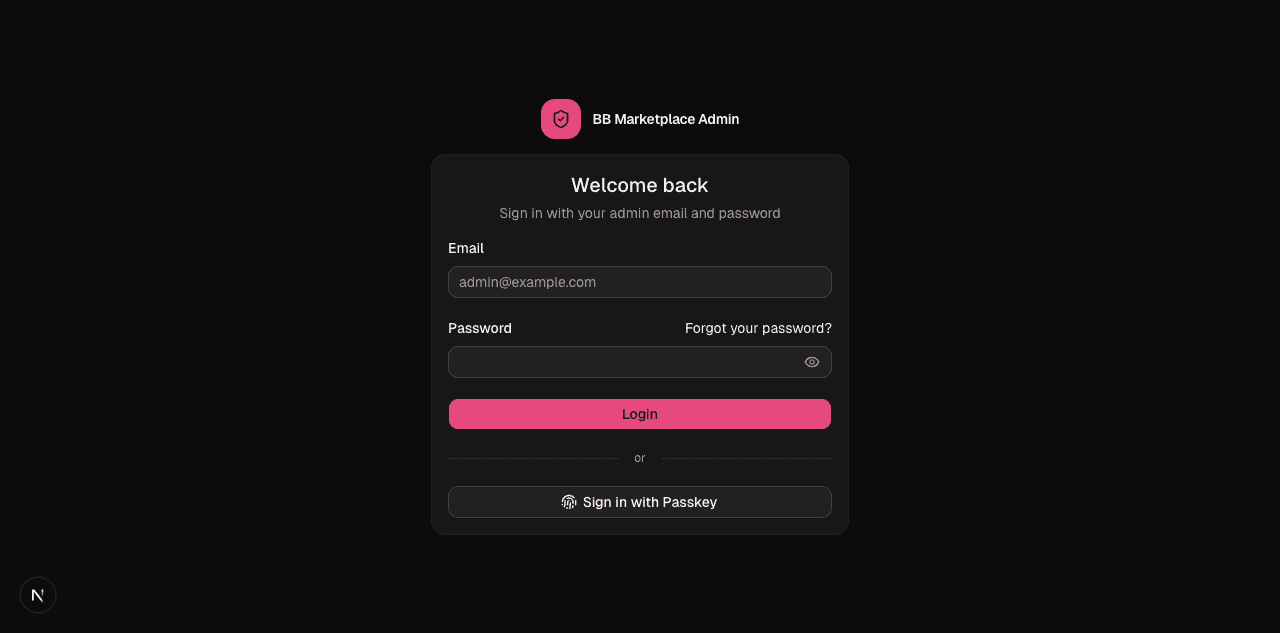
- URL:
http://localhost:3004 - Login:
admin@admin.com/supersecret
If you haven't read the Start Here overview yet — read it first. It explains the marketplace model (parent orders vs per-vendor sub-orders) that the rest of this page assumes.
How the screens are organised
The left sidebar groups everything into two sections:
- Platform — day-to-day commerce: Dashboard, Vendors, Orders, Banners, Dynamic Links, Product Listings, Global Scripts, Content Pages, Reports, Catalog, Product Attributes, Sales, Affiliates.
- Administration — running the back office itself: Integrations, Staff, Roles & Permissions, Notifications, Settings.
A few things behave the same everywhere, so check them on every list screen you test:
- Search box filters the list as you type.
- Columns button shows/hides table columns.
- Sort arrows on a column header re-order the list.
- Rows per page / pagination at the bottom moves between pages.
- The breadcrumb at the top (Dashboard › … ) is your "where am I" trail and the back link.
Dashboard
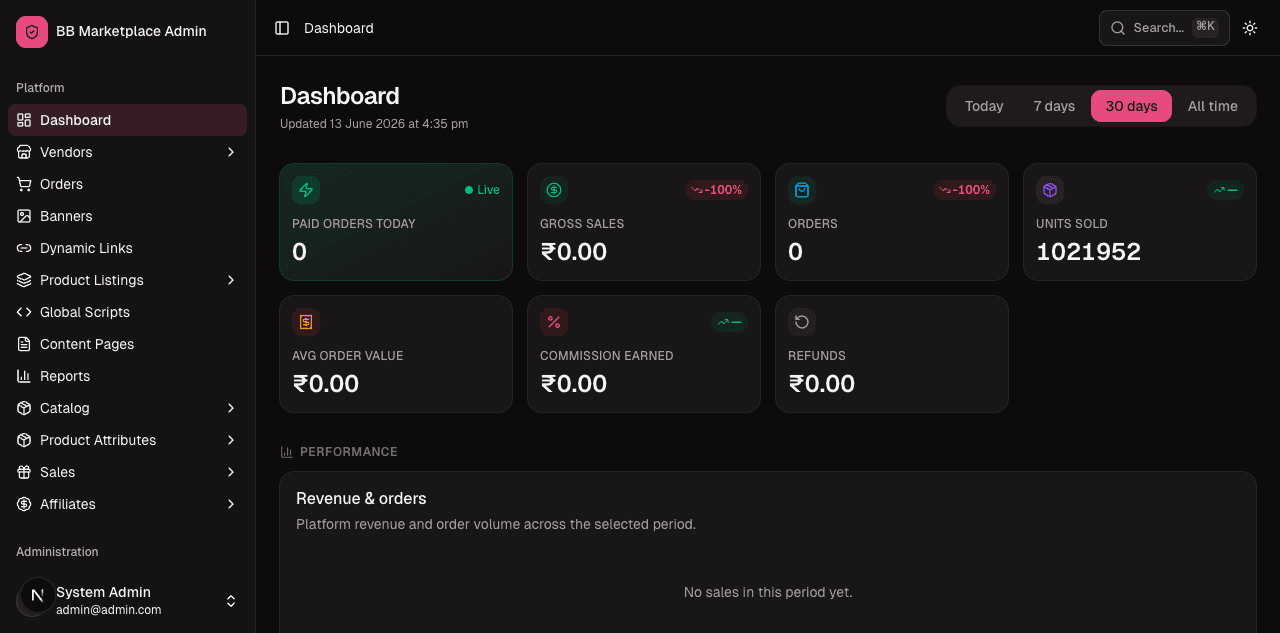
What it's for: a one-glance health check of the whole marketplace — paid orders today, gross sales, total orders, units sold, average order value, commission earned and refunds, plus a revenue chart.
Where: sidebar → Dashboard (the home screen after login).
What to test:
- Use the period switch in the top-right (Today / 7 days / 30 days / All time) and confirm every KPI tile and the chart update to that window.
- Note the Live badge on "Paid Orders Today" — this number is fed by a live stream and should tick up on its own when a new paid order arrives (you can prove this by placing an order on the storefront and watching it increase without refreshing).
- Confirm the "Updated …" timestamp reflects a recent time.
Vendors
The marketplace's sellers live here. There are two screens under Vendors:
Vendor Applications
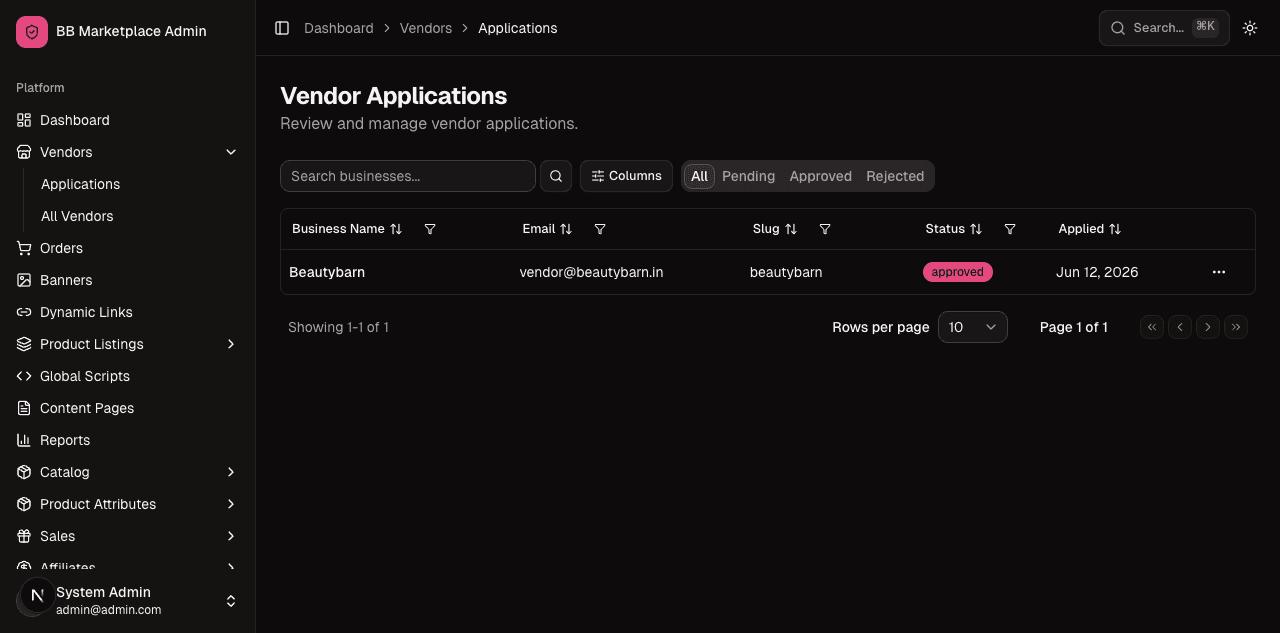
What it's for: the inbox of sellers who have applied to join. An admin reviews each application and either approves it (which creates the vendor's account and workspace, making the applicant the owner) or rejects it with a reason.
Where: sidebar → Vendors → Applications.
What to test (the onboarding flow):
- Open the Applications list. Each row is one pending seller.
- Click an application to read its submitted details (business name, contact, etc.).
- Click Approve → confirm. The application should disappear from "pending" and a new vendor should now appear under All Vendors.
- Test Reject on another application: you must provide a reason; the applicant is notified and the row moves to a rejected state.
- Edge cases: try approving an already-approved/rejected application — it should be blocked.
All Vendors
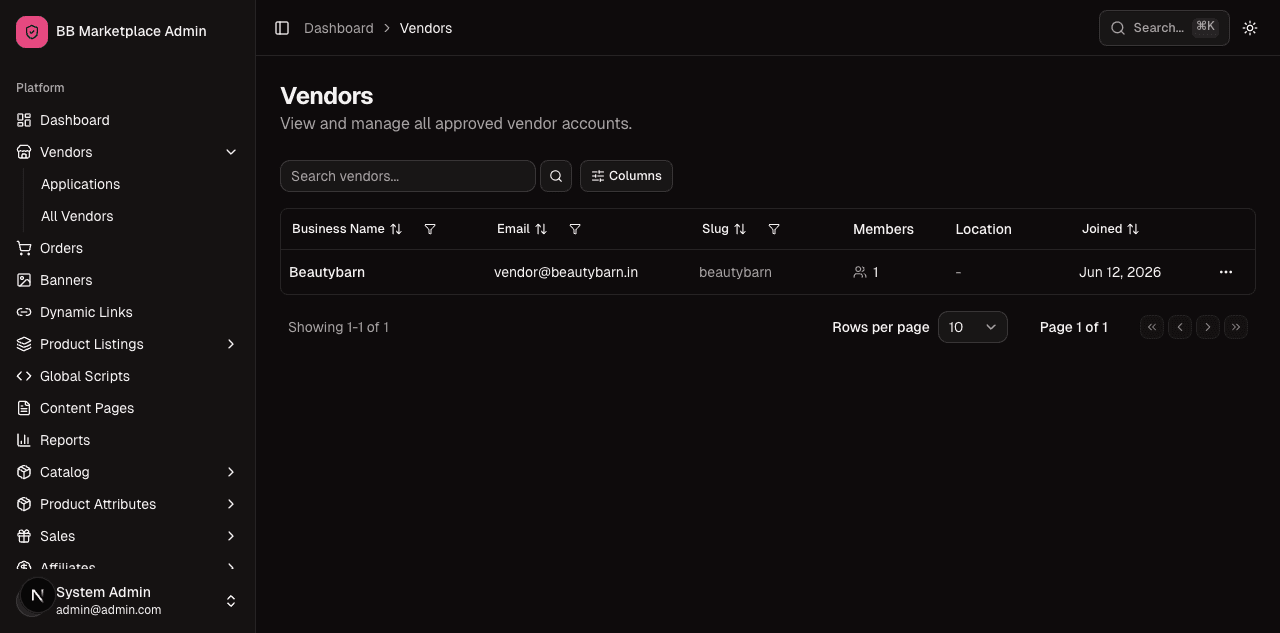
What it's for: the directory of approved sellers. Open one to inspect its profile and (importantly) its shipping override.
Where: sidebar → Vendors → All Vendors.
What to test:
- Confirm Beautybarn is listed with its email, slug, member count and join date.
- Open a vendor to view its detail page; from there you can reach the vendor's shipping configuration (the admin can override a vendor's customer-charge flat rate, free-shipping threshold and enabled couriers).
- Use the search box to find a vendor by name.
Orders
What it's for: oversight of every order on the platform. The admin can read any order, see its per-vendor split, and perform ops actions: cancel on the customer's behalf, manually mark a stuck pending payment as paid, mark a paid order as refunded, and clean up stale pending orders.
Where: sidebar → Orders.
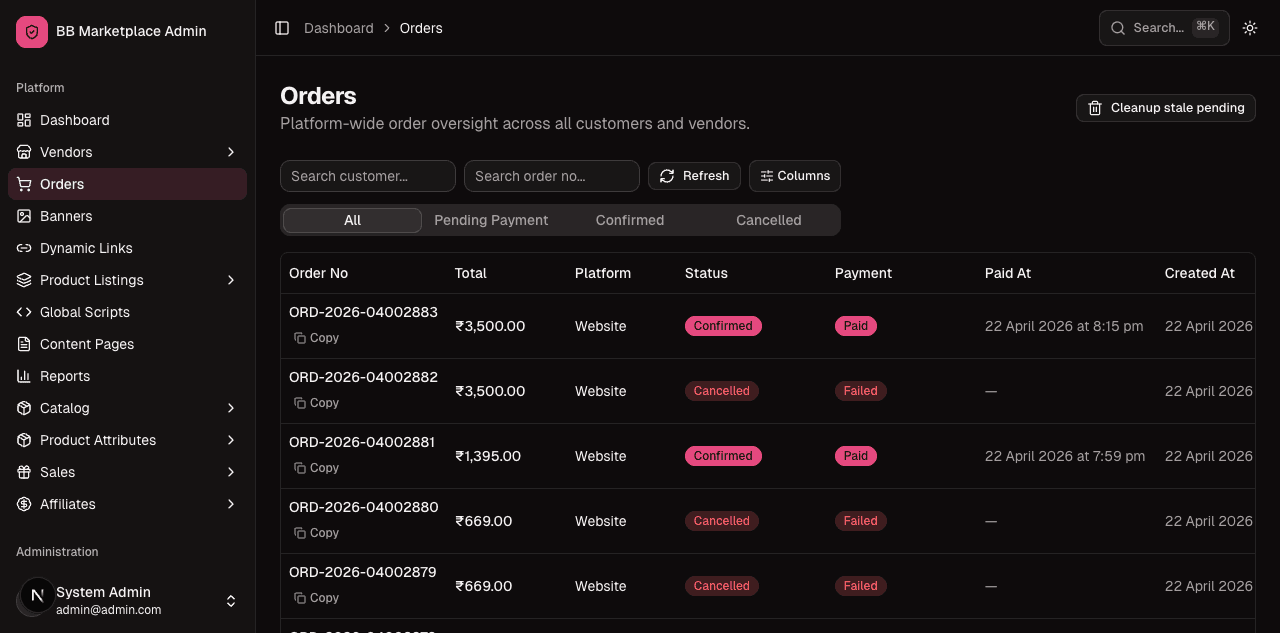
Open any order to see its full detail:
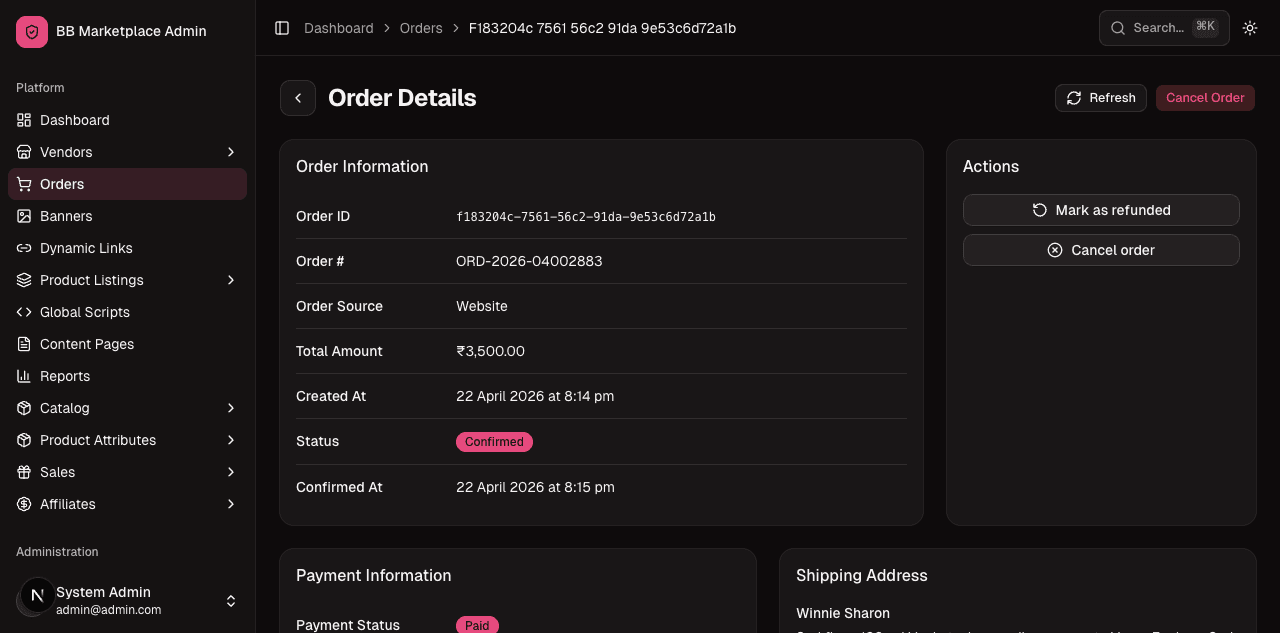
What to test:
- From the list, open an order. Confirm the header shows the order number (e.g.
ORD-2026-04002883), status (Confirmed / Pending / Cancelled …), the total, and the payment status (Paid / Cancelled …). - Scroll the detail to confirm payment information, the shipping address, the line items, and — the key marketplace concept — the per-vendor sub-order(s) inside this one parent order.
- Mark as refunded on a paid order → confirm the status changes and the action is recorded. (Status changes are audit-logged, so look for an events/history entry.)
- Cancel order → confirm it cancels and stock is released.
- Test that you cannot mark-paid an order that is already paid, etc.
Remember: the customer sees one parent order; each vendor only sees their own sub-order. The admin order detail is the only place all of it is visible together.
Banners
What it's for: promotional banners attached to a catalog entity — a category, brand, tag or ingredient. Each banner points at exactly one such entity, so the storefront can show "this banner on this category page".
Where: sidebar → Banners.
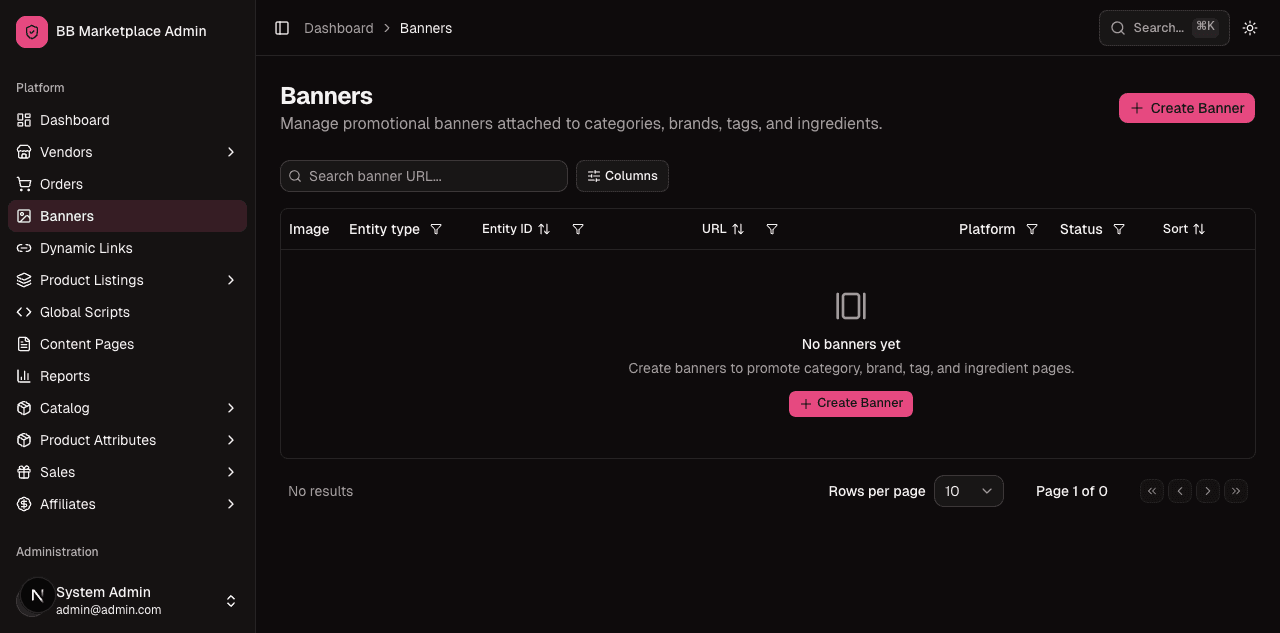
What to test:
- Create a banner: upload an image, pick the target type (Category / Brand / Tag / Ingredient) and the specific entity, set active/order.
- Confirm it appears in the list, edit it, toggle active, and delete it.
- Verify the image preview renders.
Dynamic Links
What it's for: CMS-style tile collections — e.g. the homepage banner slots / promo tiles. You create a group (addressable by slug), then add the individual links/tiles inside it.
Where: sidebar → Dynamic Links.
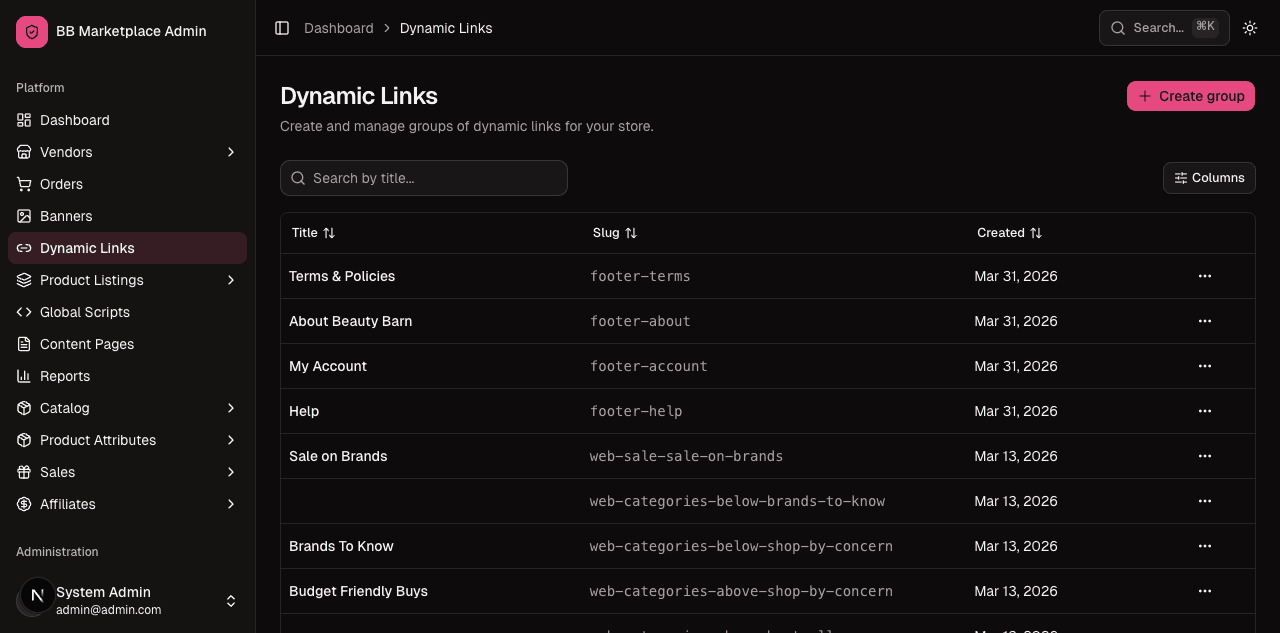
What to test:
- Create a link group, give it a name/slug.
- Open the group and add one or more links (label, image, destination URL, order).
- Reorder, edit and delete links; confirm the group's slug is what the storefront would query.
Product Listings
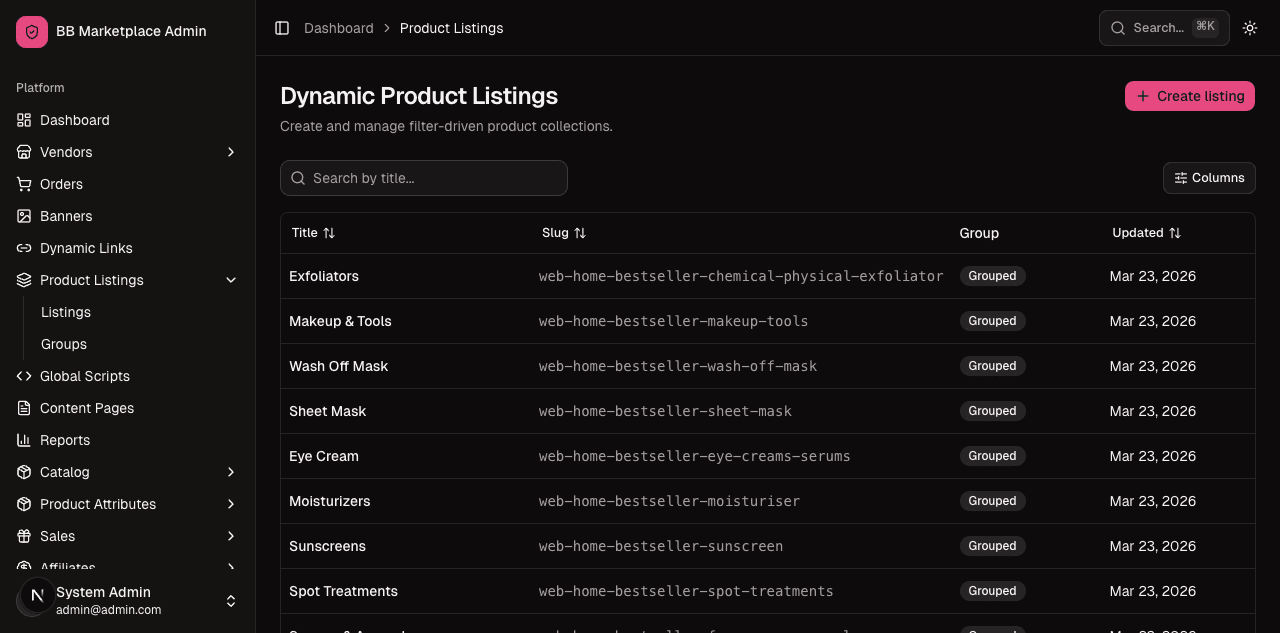
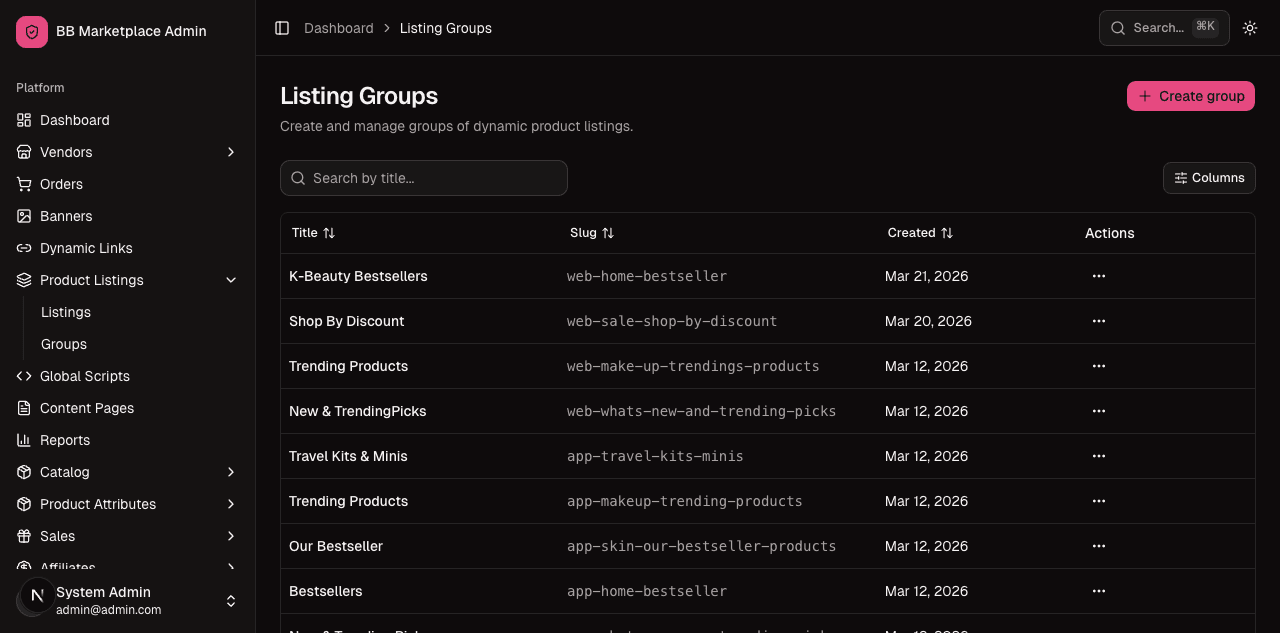
What it's for: saved, reusable product filters. A listing is a saved filter spec (e.g. "all products in Skincare under ₹500"); a group is a named container of listings. The storefront renders these as curated product rails.
Where: sidebar → Product Listings → Listings and → Groups.
What to test:
- Create a listing: define the filter (category/brand/price/etc.), save with a slug, and confirm a preview of matched products.
- Create a group and add listings to it; confirm ordering.
- Edit the filter on an existing listing and confirm the matched set changes.
Global Scripts
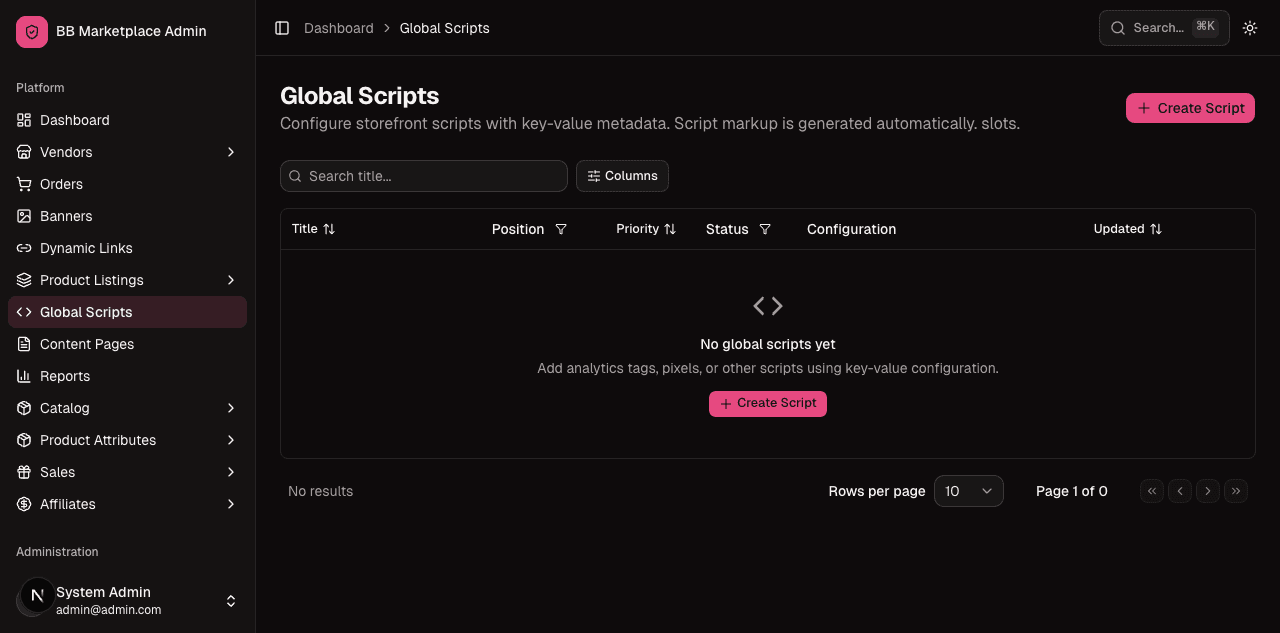
What it's for: raw HTML/JS snippets the storefront injects into the page — analytics tags, marketing pixels, inline styles, chat widgets. Each script is placed in a chosen injection slot (e.g. head or body).
Where: sidebar → Global Scripts.
What to test:
- Create a script, paste a snippet, choose its placement, set active.
- Edit and delete it; toggle active off and confirm it would stop injecting.
Because this injects raw code into the storefront, it's a sensitive area — confirm only admins with the right permission can reach it.
Content Pages
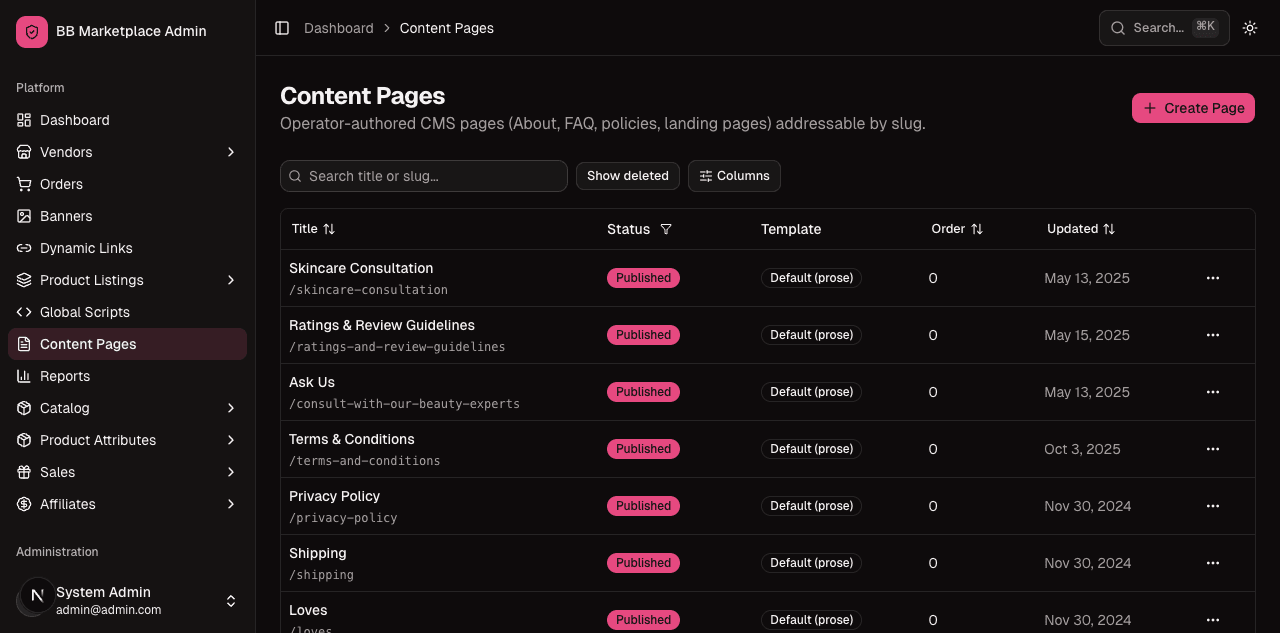
What it's for: operator-authored static pages (About, FAQ, Terms …) addressable by slug. The content is raw HTML rendered as-is, and pages can be nested into a tree via a parent page.
Where: sidebar → Content Pages.
What to test:
- Create a page (title, slug, HTML body, optional parent).
- Edit it and confirm changes save.
- Set a parent and confirm the page nests under it.
- Delete a page and confirm its slug stops resolving.
Reports
What it's for: operational reports — orders, discount redemptions, customers and more — with a date range, paginated views, and async CSV/XLSX exports you can download. There's also a Search Insights report for what shoppers searched.
Where: sidebar → Reports.
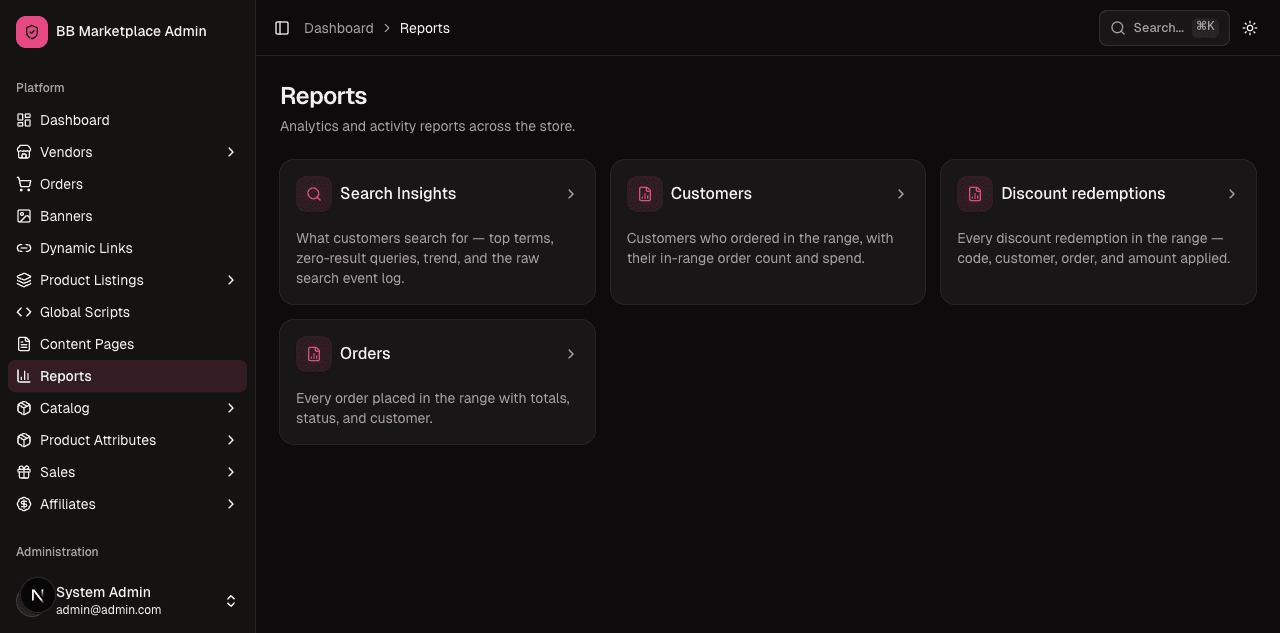
What to test:
- Open a report, set a date range, and confirm the table/KPIs update.
- Trigger an export (CSV or XLSX). Exports run in the background — confirm you get a downloadable file when it's ready.
- Open Search Insights and confirm top searches / zero-result searches are listed.
Catalog
The shared, platform-wide product catalog and its taxonomy. The admin can read any vendor's products and variants, and has full control over the shared taxonomy (brands, categories, tags, ingredients). Vendors can request new taxonomy entries; the admin approves them here.
Products
Where: sidebar → Catalog → Products.
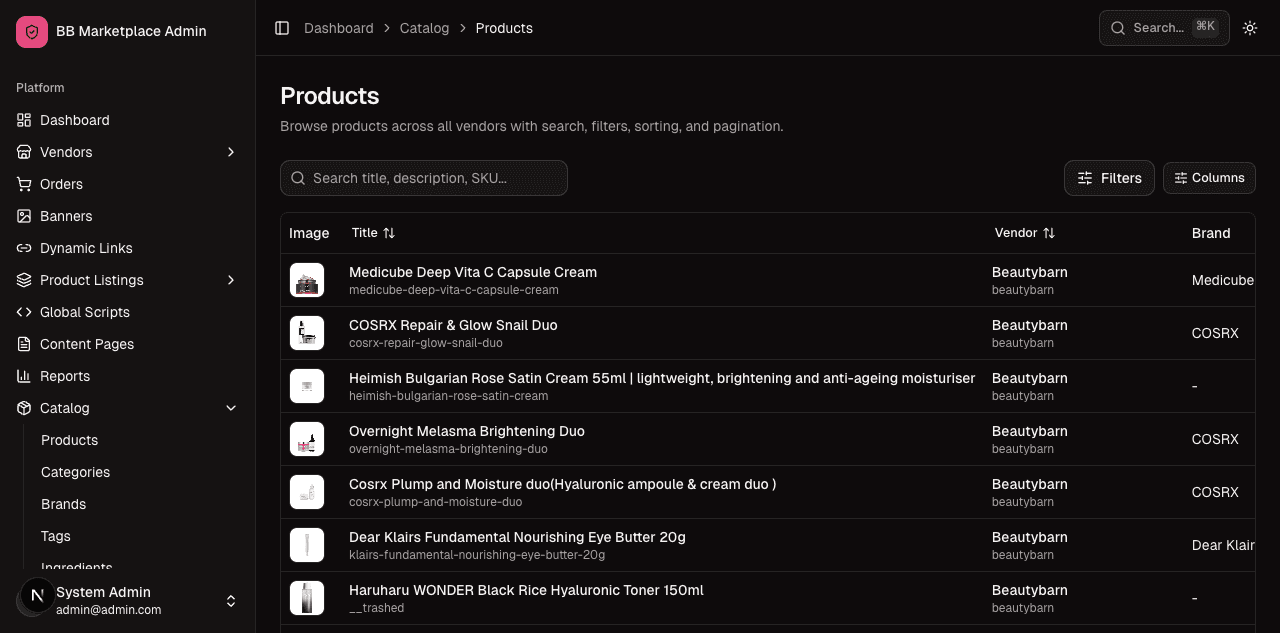
Open a product to inspect it:
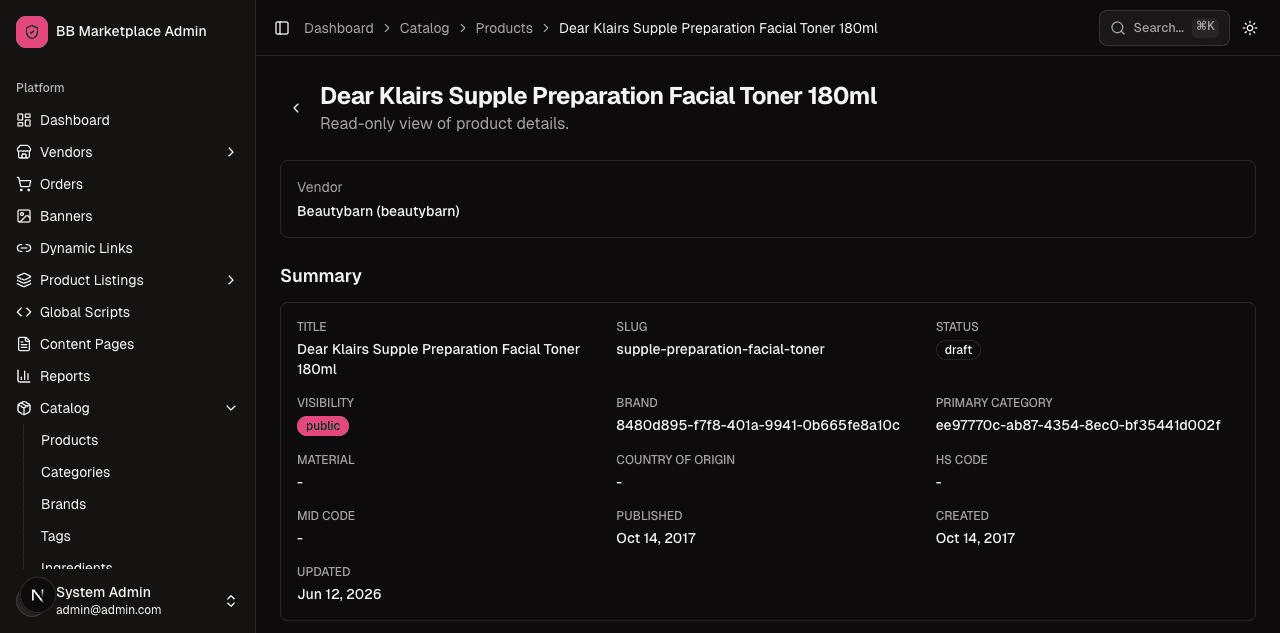
What to test:
- Search/filter the products list; open a product.
- Confirm you can see its variants, images, and the vendor it belongs to.
- Note that HSN tax codes live on each variant (variants in one family can differ) — check they're shown at the variant level.
Categories / Brands / Tags / Ingredients
These four are the shared taxonomy. Each is a simple CRUD list.
Where: sidebar → Catalog → Categories / Brands / Tags / Ingredients.
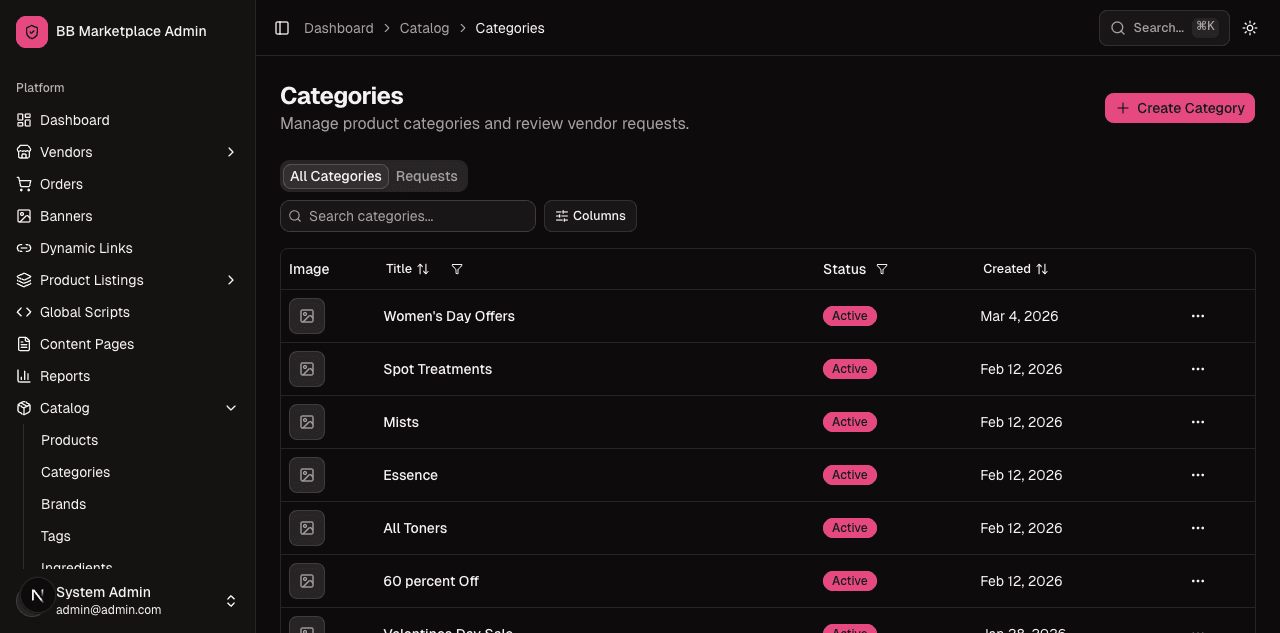
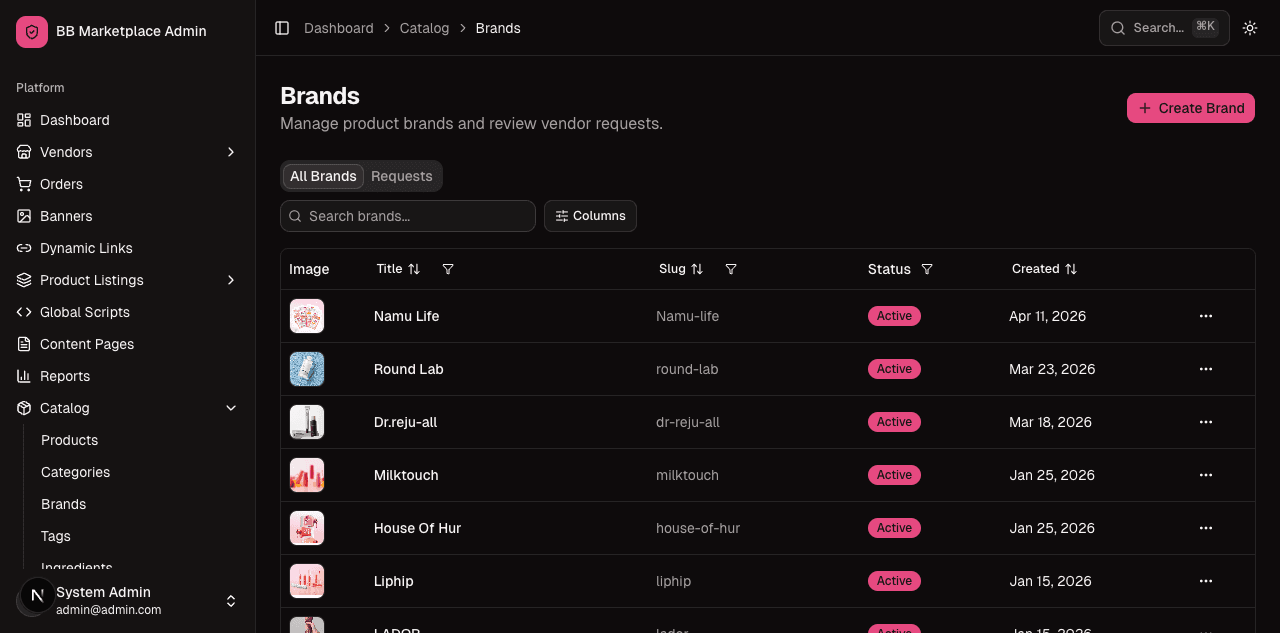
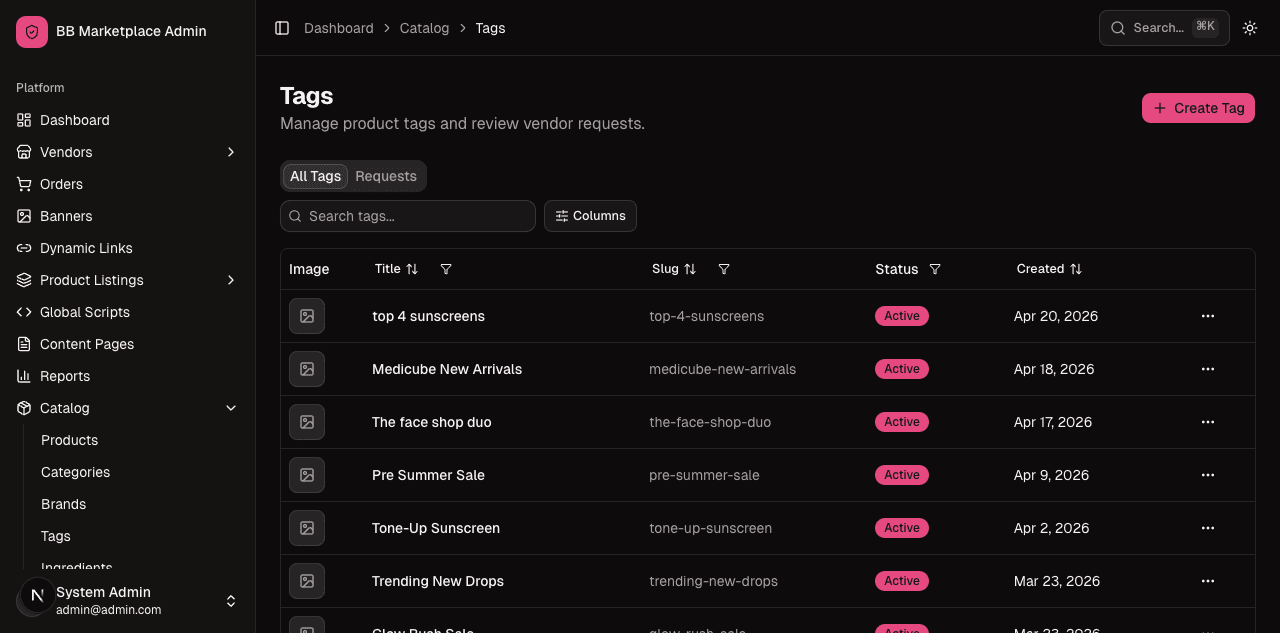
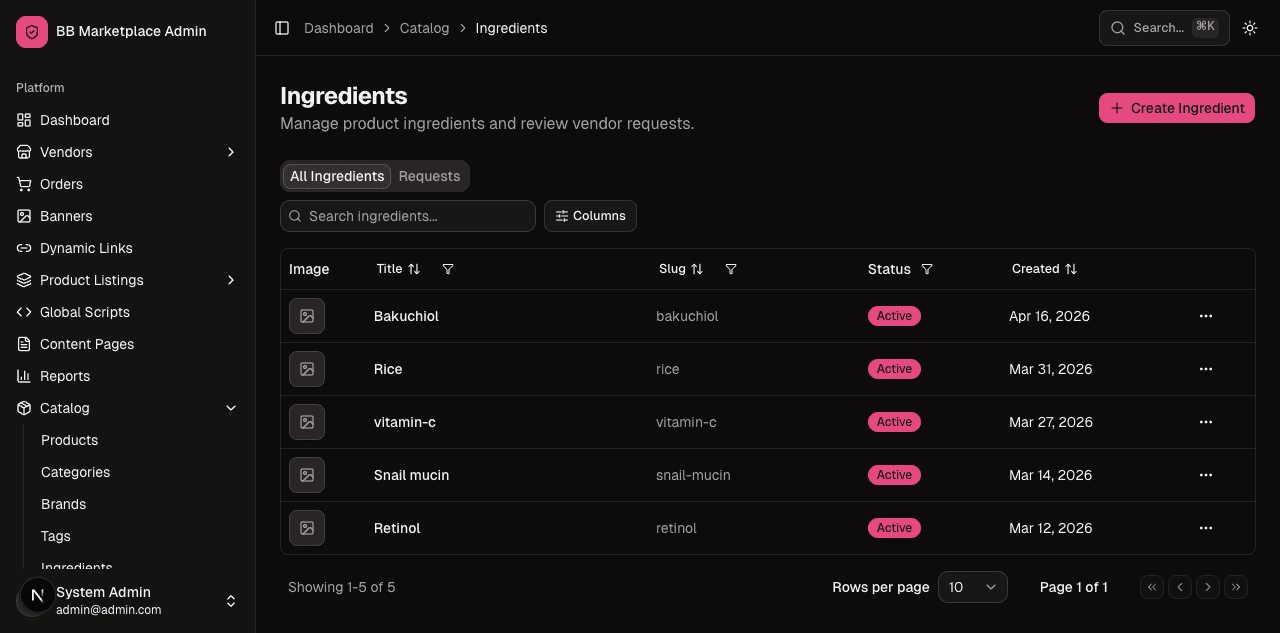
What to test (for each):
- Create an entry (name, slug, image where applicable; categories can be nested).
- Edit and delete.
- Look for any vendor requests awaiting approval (a vendor asked to add a new brand/category/tag/ingredient) and approve/reject one.
Product Attributes
What it's for: the structured attributes that describe products (e.g. "Skin Type", "Finish"), and attribute groups that bundle related attributes together.
Where: sidebar → Product Attributes → Product Attributes and → Product Attribute Groups.
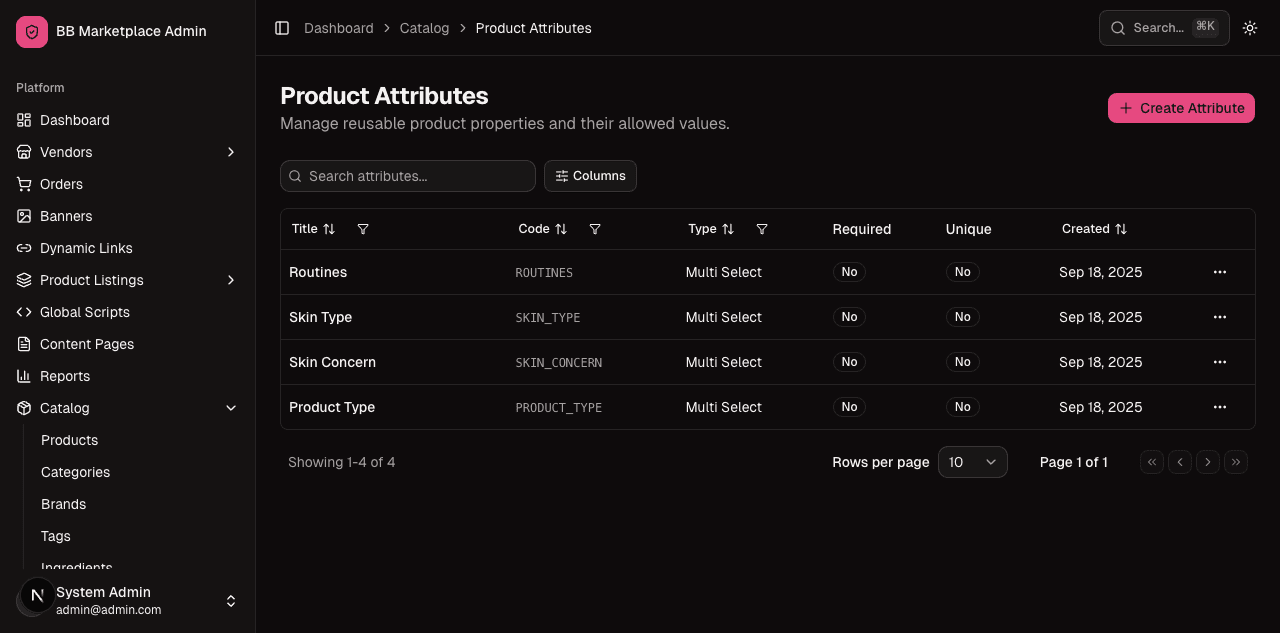
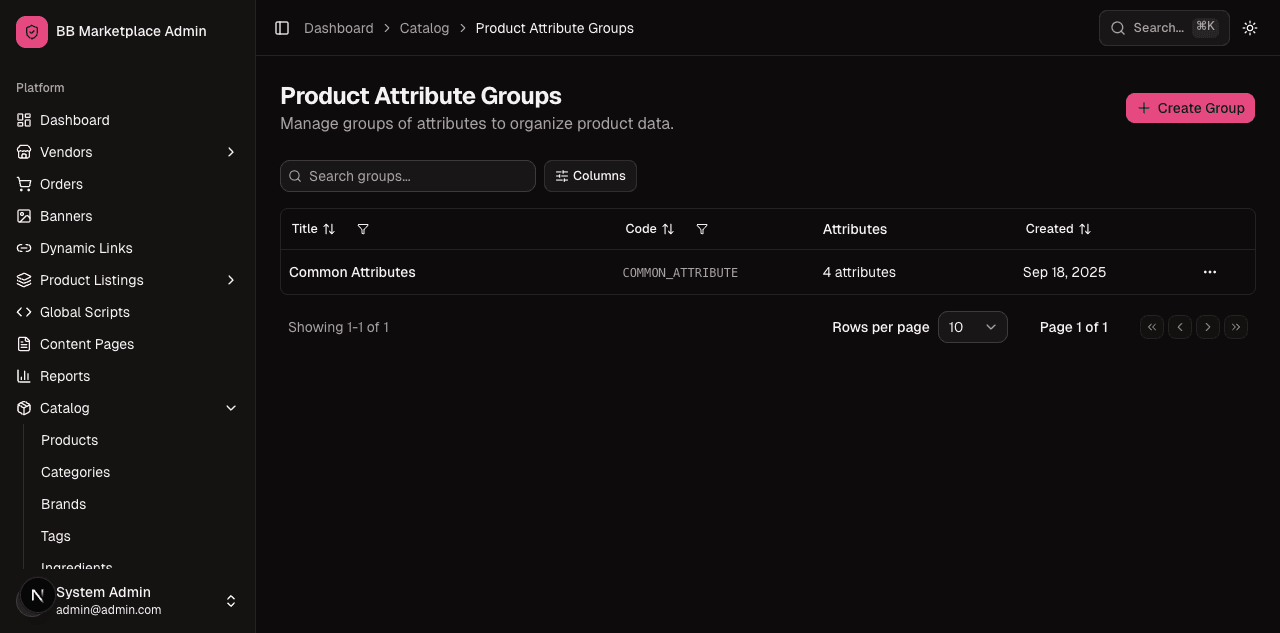
What to test:
- Create an attribute (name, type, allowed values).
- Create a group and assign attributes to it; confirm ordering.
- Edit/delete and confirm dependent products still behave.
Sales
Three promotion tools live under Sales.
Discounts
What it's for: platform-wide coupons — percentage or fixed-amount, with rich targeting (specific variants, categories, brands, tags, ingredients or vendors) and usage limits.
Where: sidebar → Sales → Discounts.
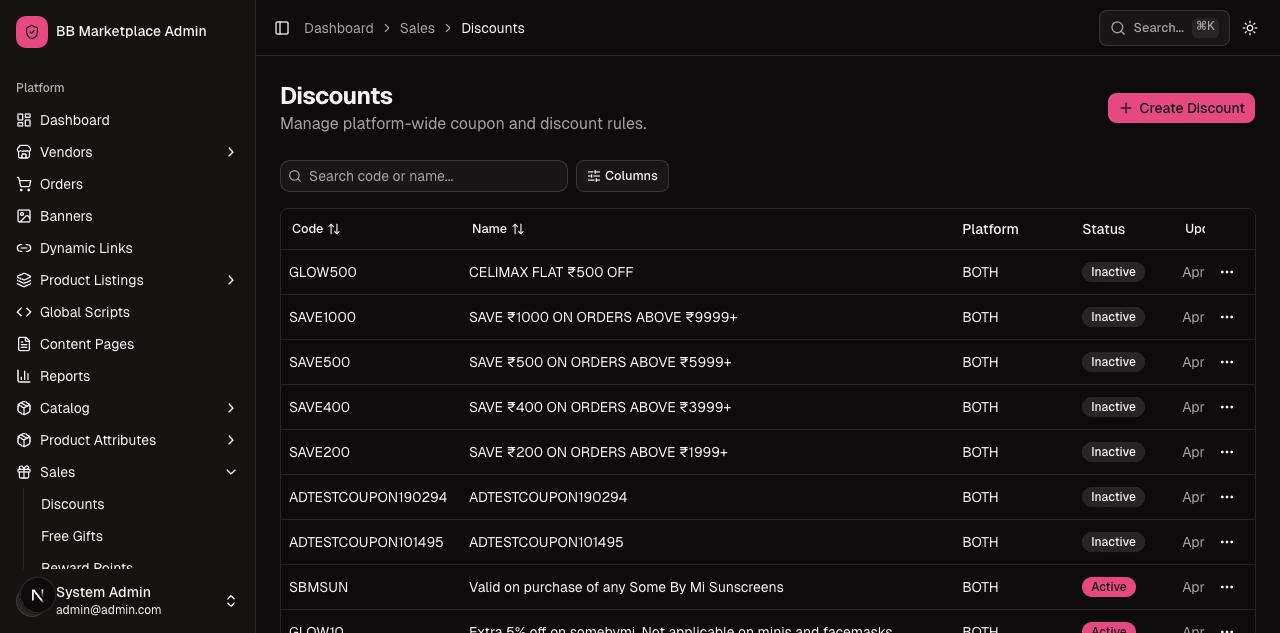
Creating one:
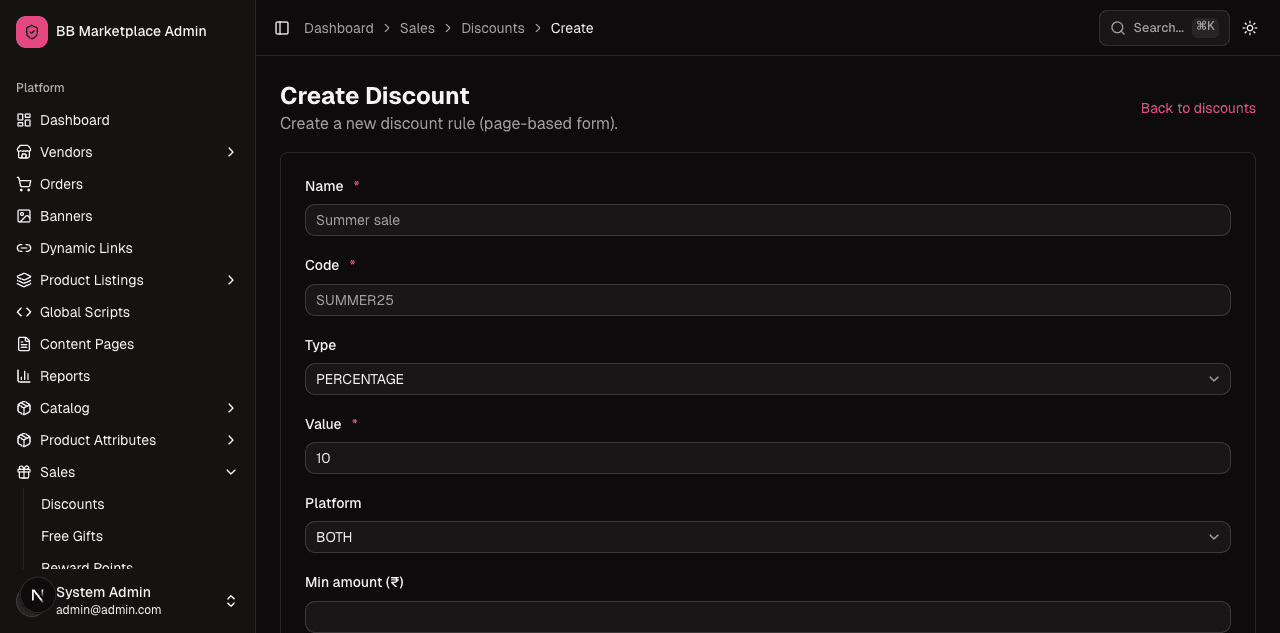
What to test:
- Create a discount: choose percentage vs fixed amount, set the code, the targeting, validity dates and any usage cap.
- Apply the code on the storefront cart and confirm the price drops correctly (and that money math is exact — no rounding errors).
- Test limits: an expired code, a code over its usage cap, and a code that targets a product not in the cart (should not apply).
- Edit and deactivate a discount.
Free Gifts
What it's for: "add a free item when the cart qualifies" promotions. One row per rule; the cart engine offers the gift and the customer claims it at checkout.
Where: sidebar → Sales → Free Gifts.
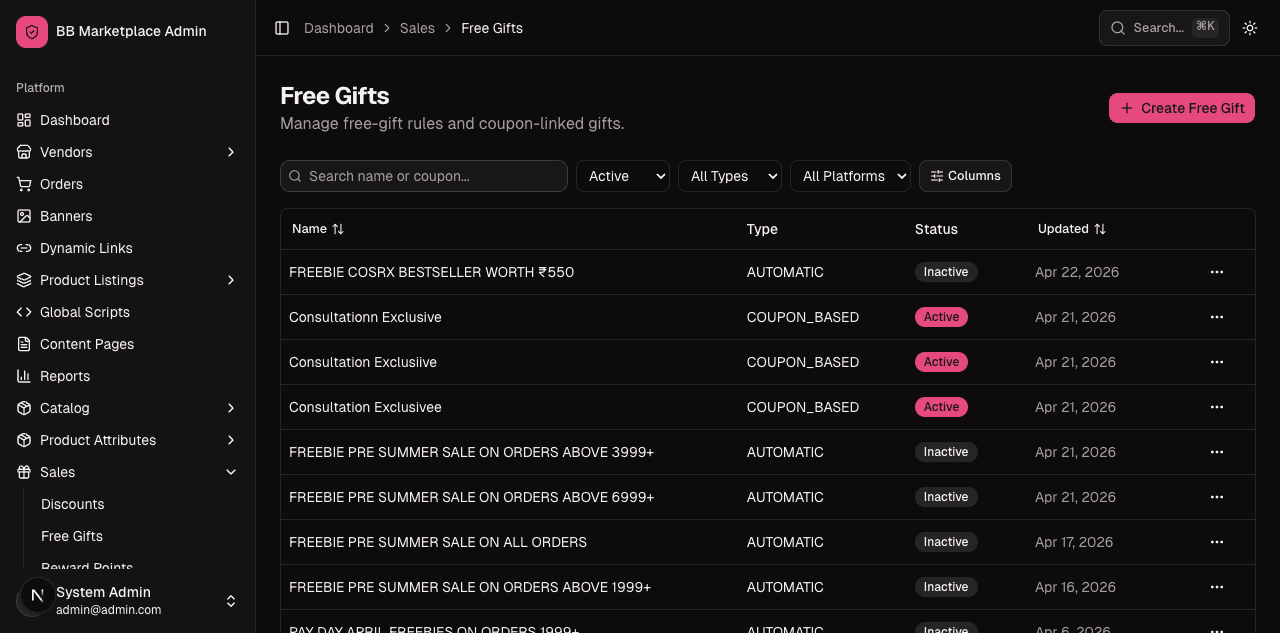
What to test:
- Create a rule (qualifying condition + the gift product).
- On the storefront, build a cart that does and does not meet the condition and confirm the gift is offered only when it qualifies.
- Edit, deactivate and delete a rule.
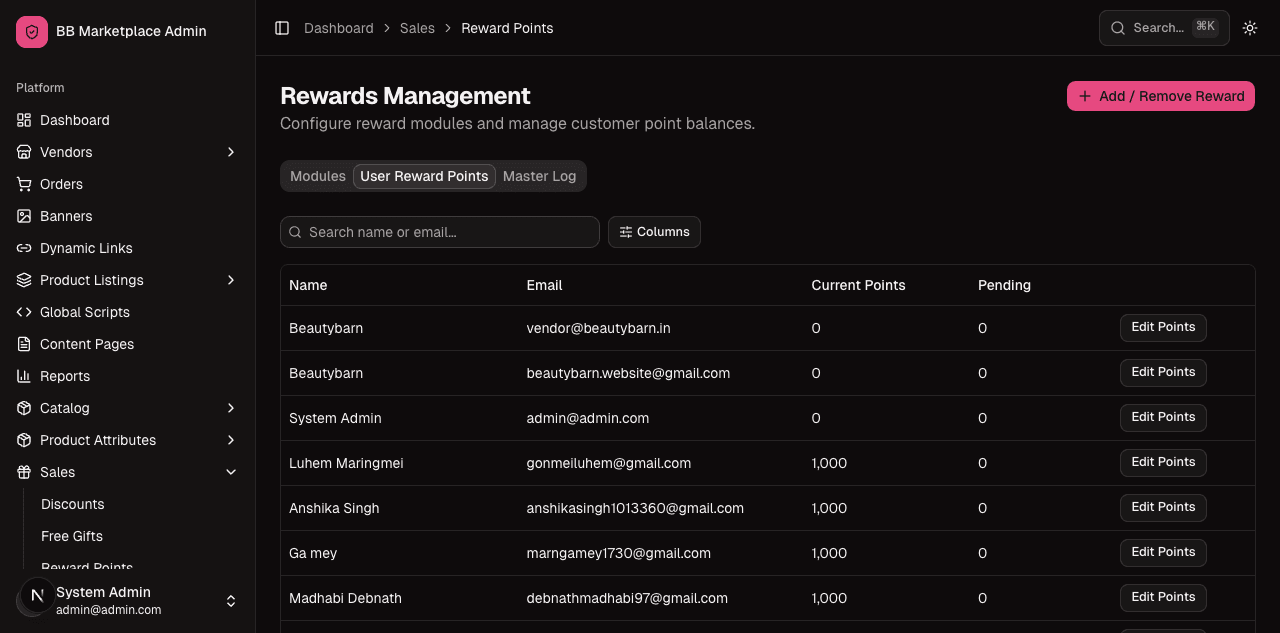
Reward Points
What it's for: the loyalty plugin — inspect any customer's points balance and history, view the master ledger, make manual credit/debit adjustments, and configure the earning rules (registration, purchase, review, point expiry, rewarding).
Where: sidebar → Sales → Reward Points.
What to test:
- Search a customer and open their balance + history.
- Make a manual credit and a debit; confirm the balance and ledger update.
- Open the rule modules (User Registration, Product Purchase, Product Review, Point Expiry, Rewarding) and toggle/adjust a rule; confirm new activity earns points per the rule.
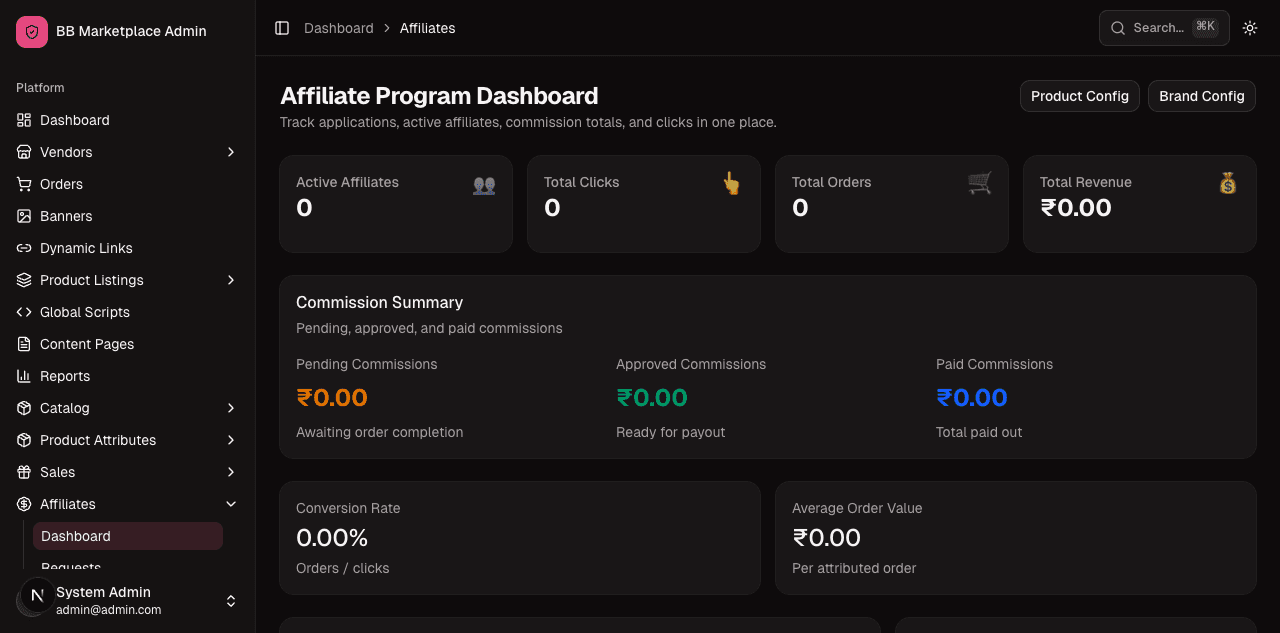
Affiliates
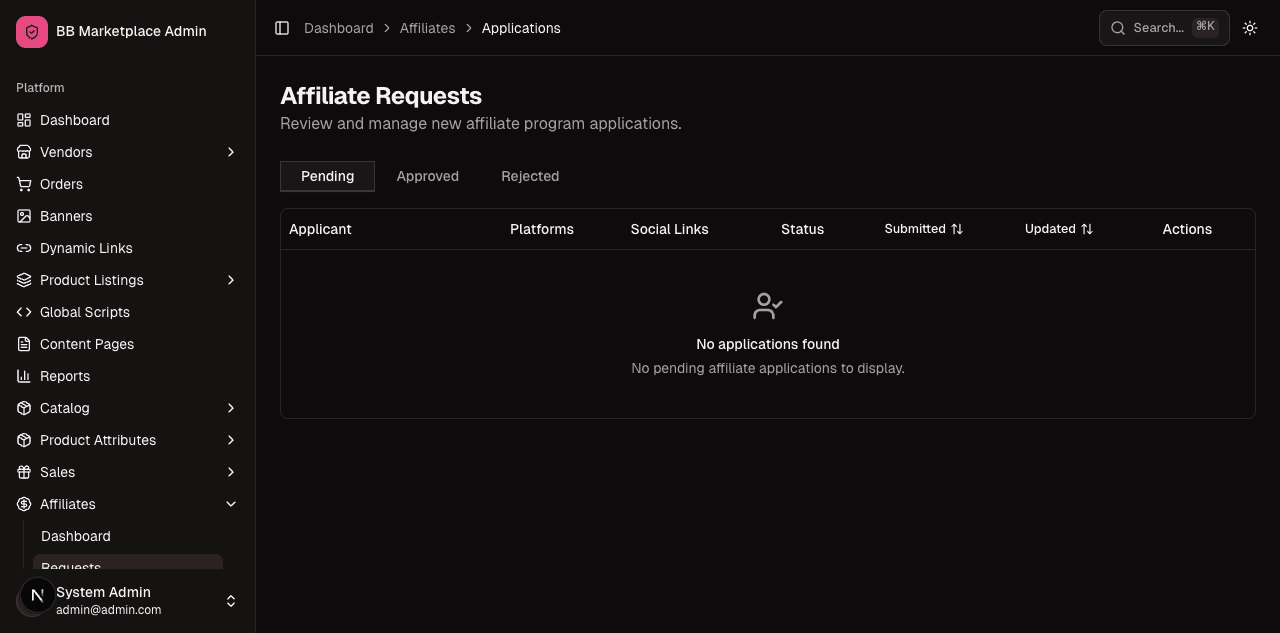
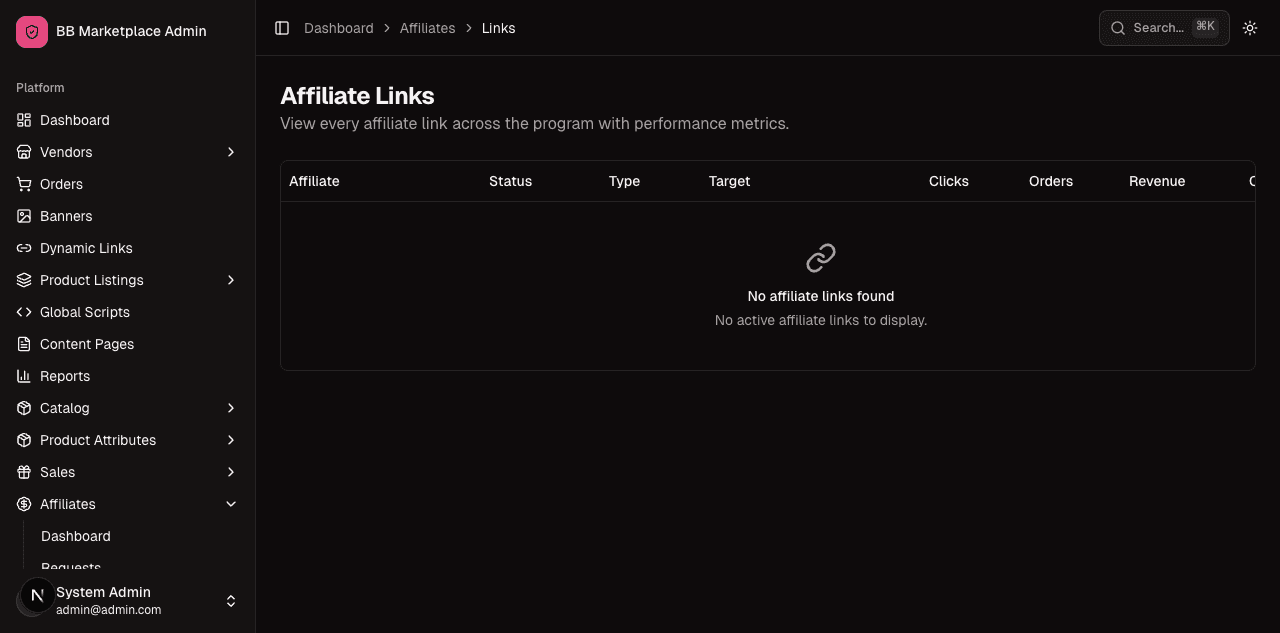
What it's for: the affiliate/partner programme. Review applications, manage affiliates (including suspend/resume and per-affiliate commission overrides), manage their links, track commissions, and process payouts.
Where: sidebar → Affiliates (Dashboard, Requests/Applications, Affiliates, Links, Commissions, Payouts).
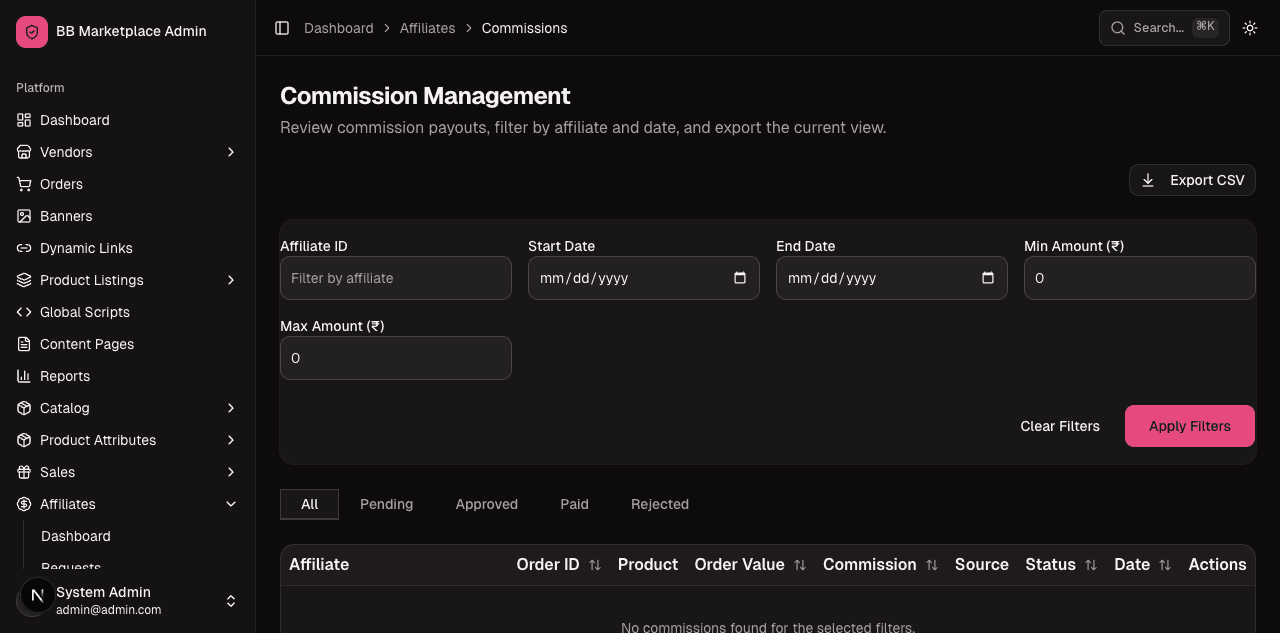
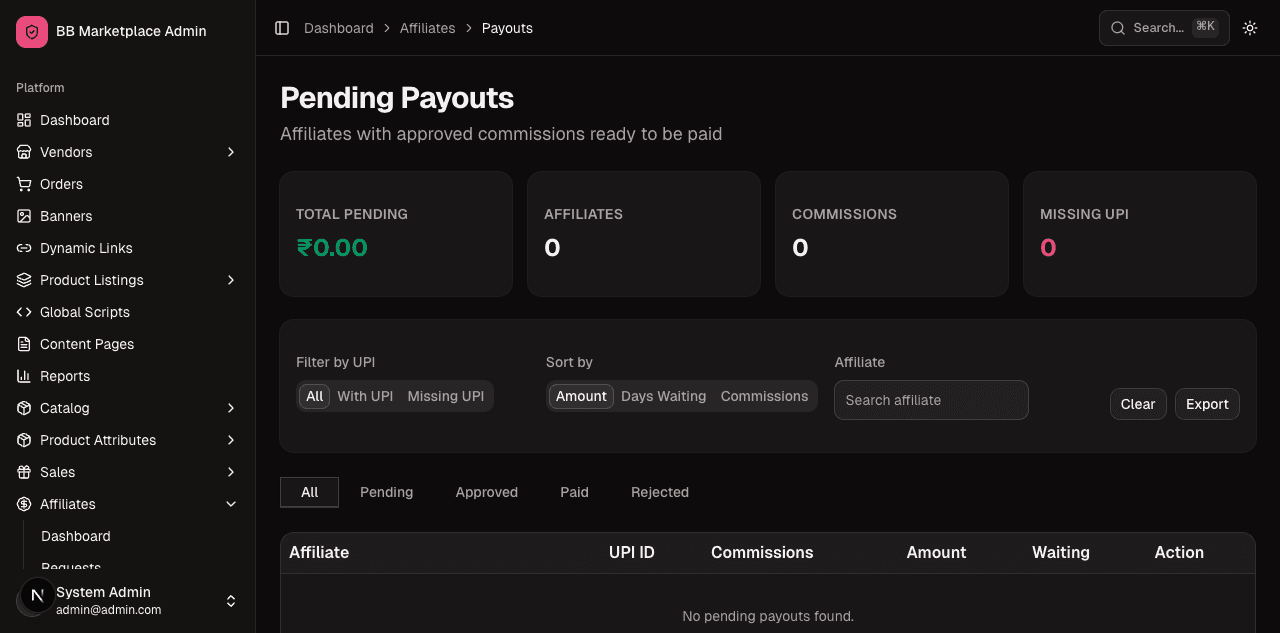
What to test:
- Approve/reject an affiliate application.
- Open an affiliate, set a commission override, and suspend/resume them.
- Inspect Links (the trackable URLs) and Commissions (what's been earned).
- Process a payout and confirm the affiliate's owed balance changes.
Administration
Integrations — Klaviyo
What it's for: connecting the store to Klaviyo (marketing automation). Connect/disconnect the account and inspect each outbound sync surface — profiles, events, product catalog, categories, coupons.
Where: sidebar → Integrations → Klaviyo.
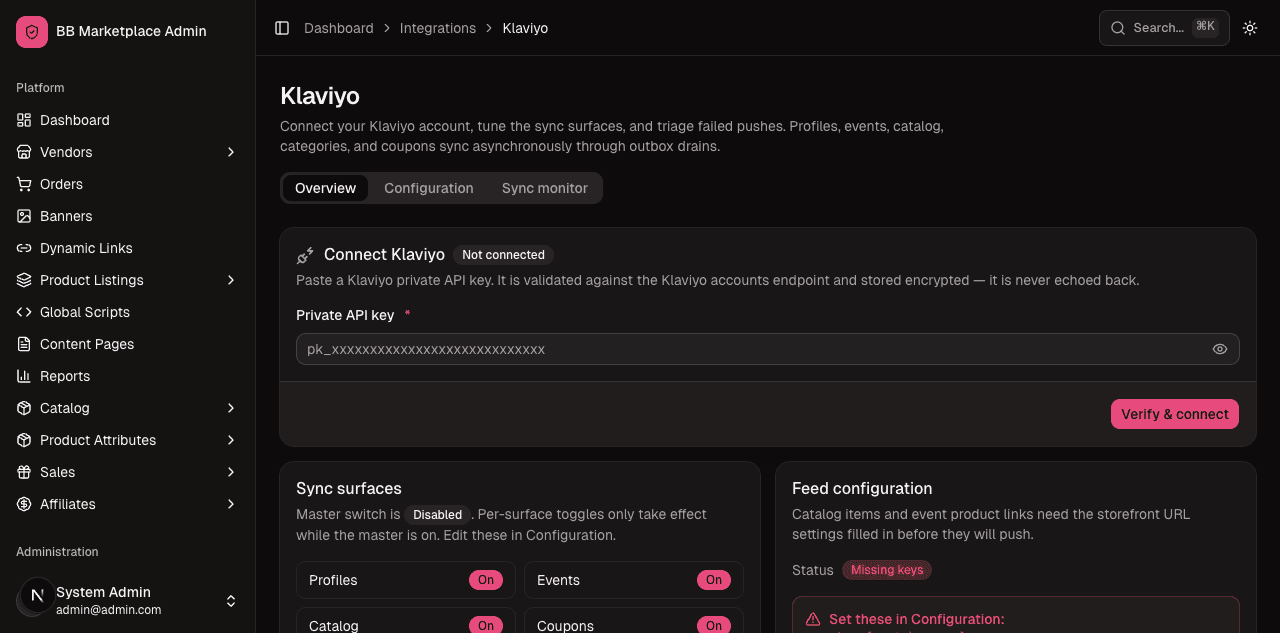
What to test:
- View connection status; test connect/disconnect.
- Open each sync tab (Profiles / Events / Catalog / Categories / Coupons) and confirm sync status/counts are shown and a manual sync can be triggered.
Staff
What it's for: the people who can log into the Admin Panel. Invite/create staff accounts and assign them roles.
Where: sidebar → Staff.
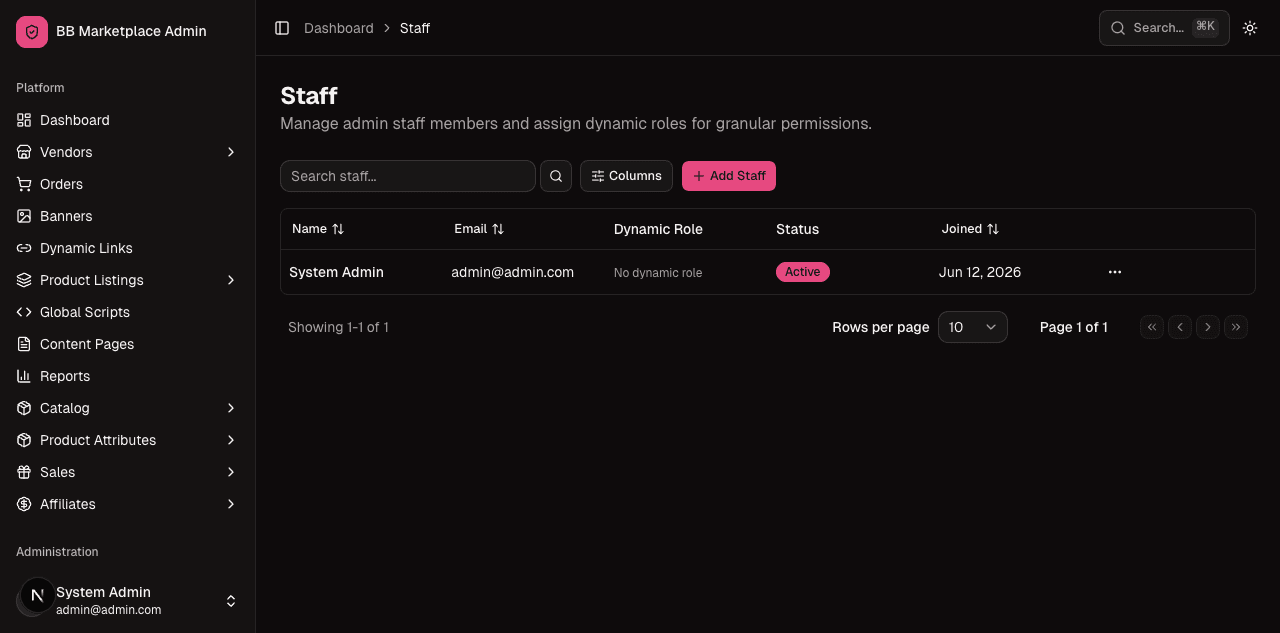
What to test:
- Create/invite a staff member and assign a role.
- Confirm a staff member with a limited role can't see modules their role doesn't grant.
- Deactivate a staff member and confirm they lose access.
Roles & Permissions (RBAC)
What it's for: defining which actions each role can perform. The catalog of permissions is fixed in the system; here you build roles that grant a chosen subset.
Where: sidebar → Roles & Permissions → Dynamic Roles.
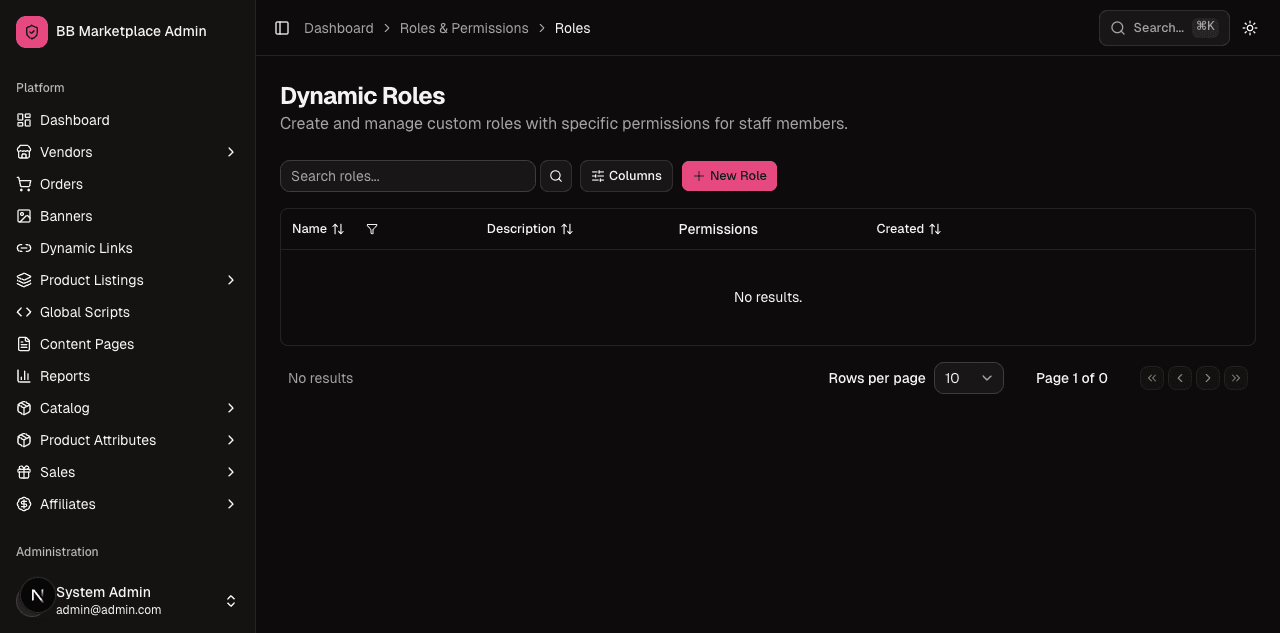
What to test:
- Create a role and tick a subset of permissions (e.g. only "order: view").
- Assign it to a staff member and verify (in another session) that they can only do what's granted — every other module should be hidden or blocked.
- This is a high-value security test: confirm that missing a permission blocks the action server-side, not just hides the menu.
Notifications
What it's for: composing and sending broadcasts — one-shot email and/or push to a targeted audience — and reviewing the notification log.
Where: sidebar → Notifications (and Notifications → Broadcasts).
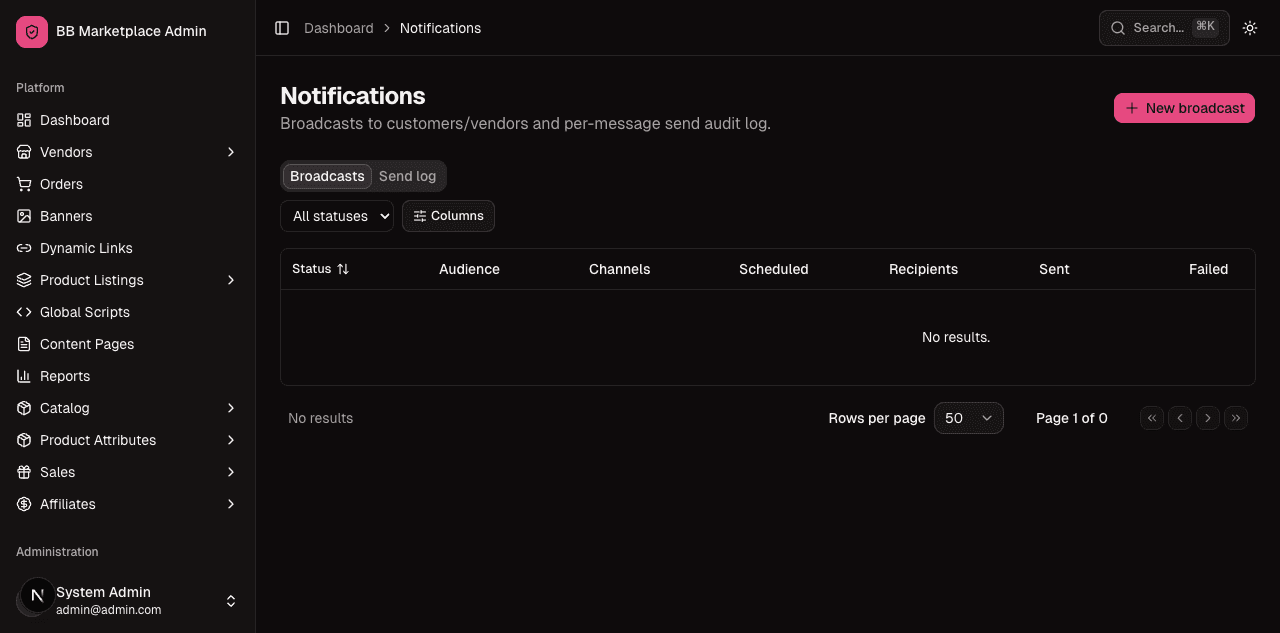
What to test:
- Create a broadcast: pick channel(s) (email/push), define the audience, write the message, and send (or schedule).
- Confirm it appears in the broadcast list/log with a delivery status.
- Test audience targeting so a broadcast only reaches the intended group.
Settings
What it's for: all the store-wide configuration switches, grouped into sections (store details, payments, shipping defaults, tax, etc.). The admin can also override an individual vendor's settings from here.
Where: sidebar → Settings.
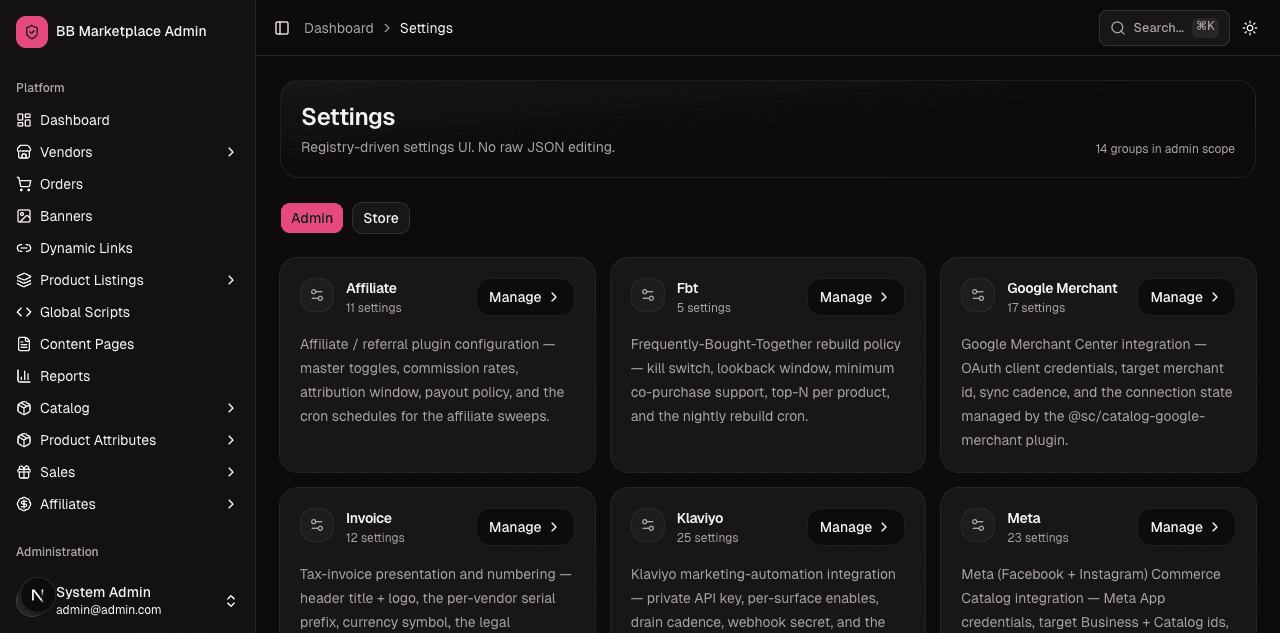
What to test:
- Open a settings group, change a value, save, reload and confirm it persisted.
- Test validation: enter an invalid value and confirm it's rejected with a clear message.
- Where a vendor-override surface exists, change a single vendor's setting and confirm it only affects that vendor.
Your account (Profile)
What it's for: your own admin account — profile details, security (password/passkey), and active sessions, plus a danger zone.
Where: click your name at the bottom-left → Profile / Security / Sessions.
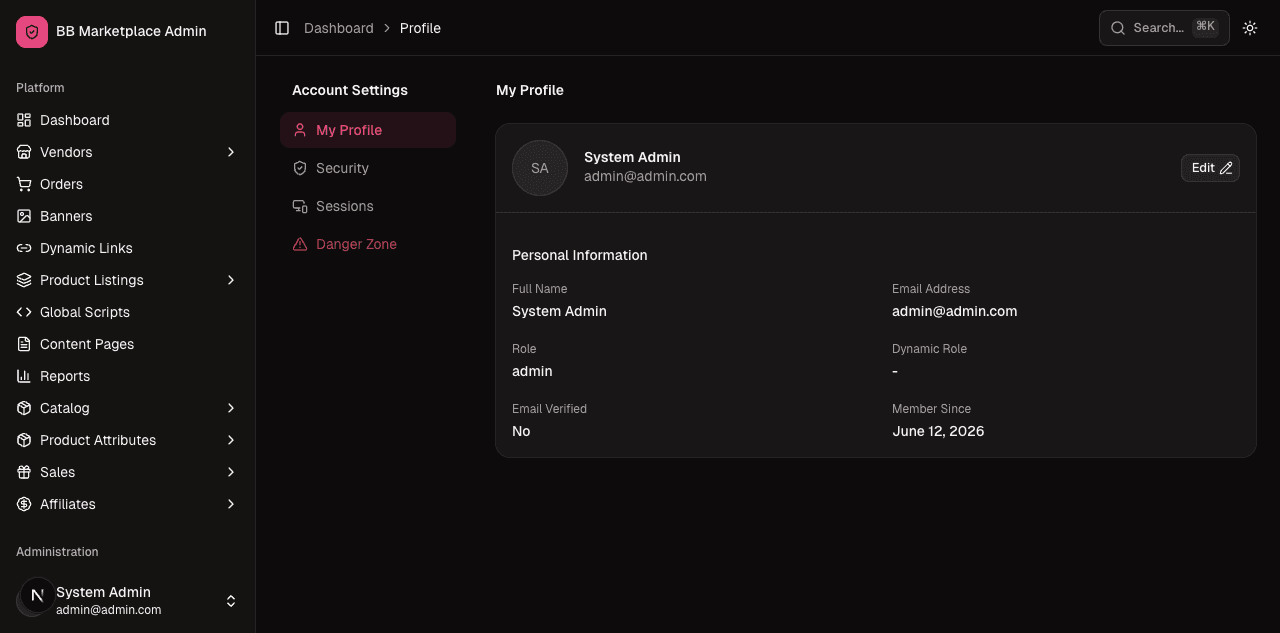
What to test:
- Update profile details and save.
- Change password and confirm re-login works.
- Open Sessions and revoke another session; confirm it's signed out.
Quick admin test checklist
- Log in; dashboard KPIs respond to the period switch and the live counter ticks.
- Approve and reject a vendor application; approved vendor appears in All Vendors.
- Open an order; see the per-vendor sub-order; mark refunded / cancel; change is logged.
- Create + apply a discount; expired / over-limit / non-matching codes are rejected.
- Create a free-gift rule; gift offered only when the cart qualifies.
- Adjust a customer's reward points; balance + ledger update.
- Build a limited role; a staff member with it is blocked from everything else.
- CRUD across catalog taxonomy; approve a vendor's taxonomy request.
- Send a broadcast to a targeted audience.
- Change a setting; it persists; invalid input is rejected.
Next: the Vendor Admin guide →.
Tester Guide — Start Here
A plain-language walkthrough of the Marketplace Admin Panel and the Vendor Admin for QA and testers: what each panel is for, how to log in, how the marketplace fits together, the glossary you need, and an end-to-end happy path you can follow to exercise the whole system.
Vendor Admin — Tester Walkthrough
A click-by-click, plain-language guide to every screen in the Vendor Admin (the seller back office) for QA and testers: what each module is for, where to find it, what you should see, and the exact steps to exercise it — with screenshots from the live app.